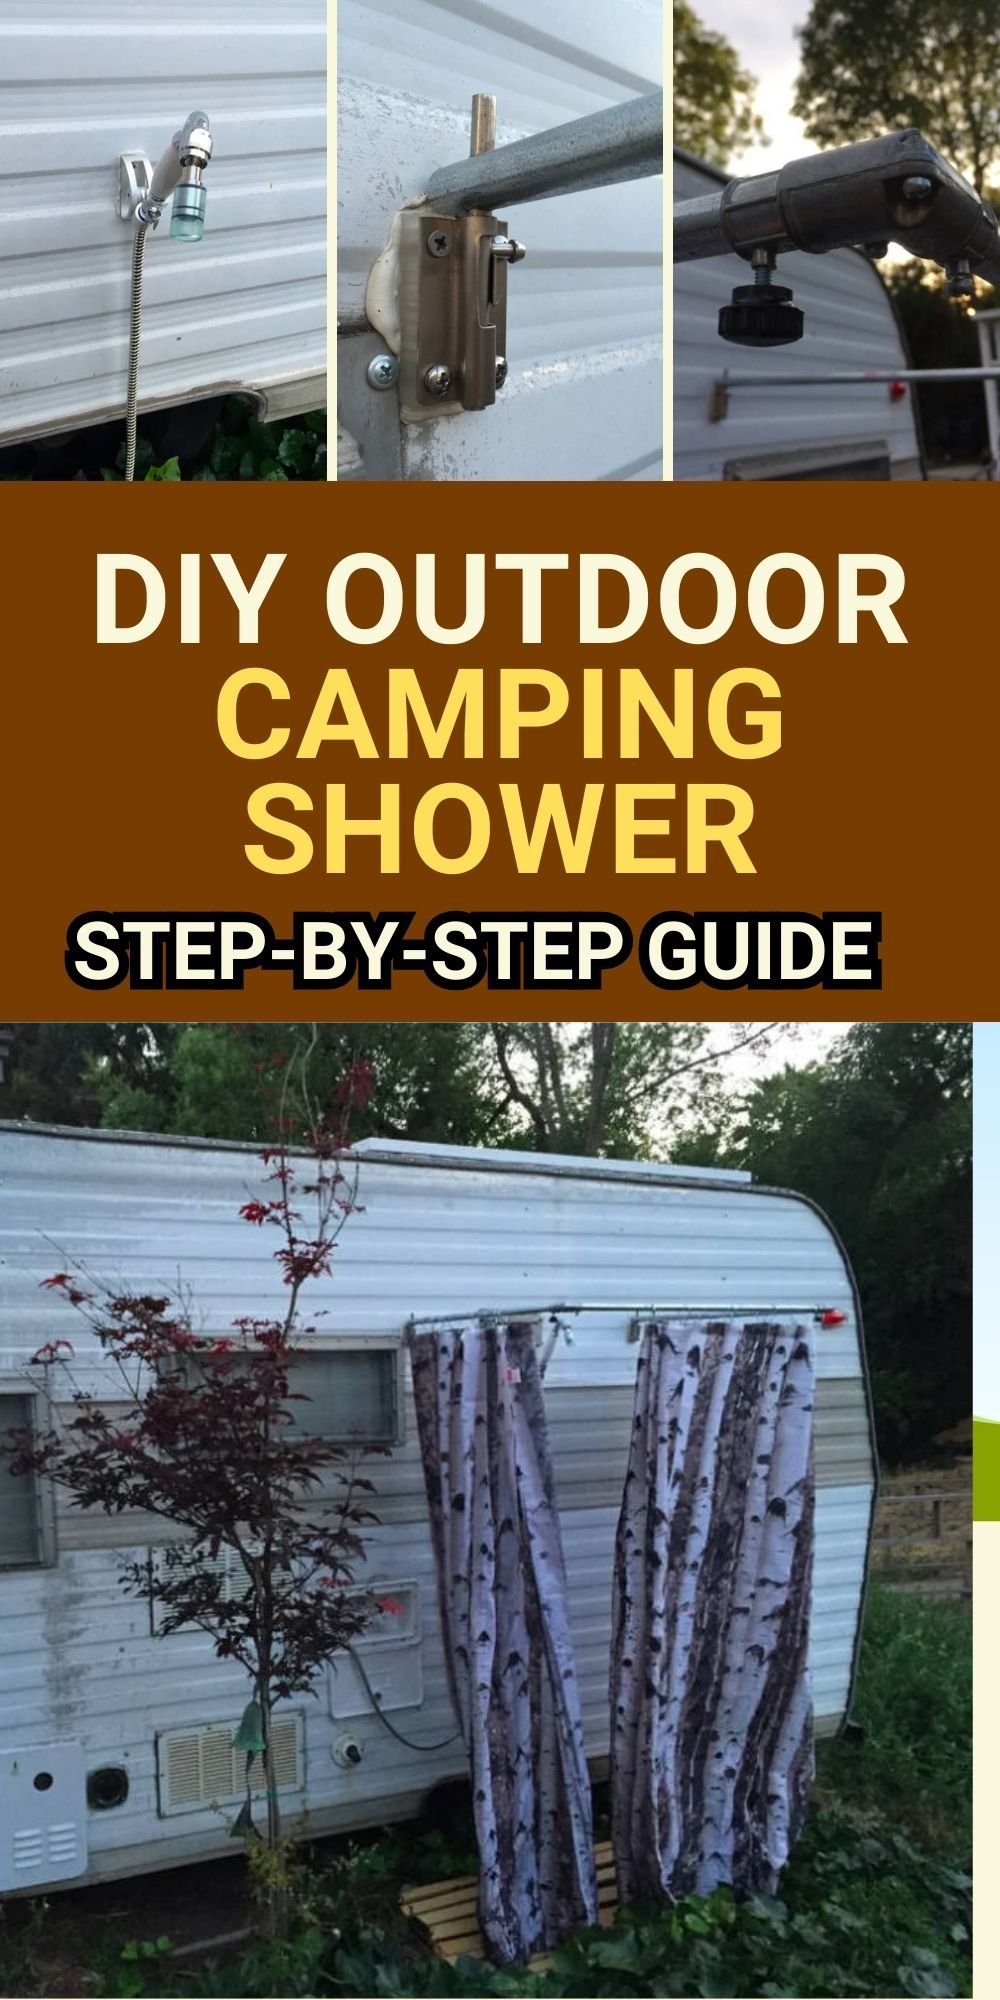
One of the most rewarding upgrades we made to our 13′ 1967 Aljo Sportsman camper was installing an outdoor shower. This project was part of a larger renovation that included an on-demand water heater, an electric water pump, a drinking water filter, 450 watts of solar, a 3000-watt inverter, and a handful of other modern conveniences.

While cutting into the camper’s exterior was daunting, the result was well worth it. Here’s how we installed the shower and built a collapsible enclosure to maintain privacy and functionality.
Why This Plan Works

- Space-Saving Design – The shower enclosure is compact and can be broken down for storage.
- Custom Mounting for Flexibility – Two shower head brackets (high and low) offer a more versatile experience.
- Upgraded Components – We swapped the stock shower head for a USA-made High Sierra low-flow model that complements the camper’s vintage aesthetic.
- Leak-Free Setup – After troubleshooting, we replaced the remote shut-off valve and hose with water-tight alternatives.
What You Will Need
- Shower unit (purchased from Camping World, but upgraded for quality)
- High Sierra low-flow shower head
- Barrel latches and custom spacers
- 1/2″ electrical conduit (for the shower frame)
- Dremel tool (for trimming barrel latches)
- Center punch and drill
- 90-degree joints
- Wire shower curtain rings
- Shower curtain
- Putty/Butyl tape and silicone for sealing
- Thumb screws (for securing the frame)
How to Make It
Step 1: Determine Shower Head Placement

Choosing the right location for the shower head bracket is crucial. We installed two mounts—one high for full-body washing and one lower for rinsing feet. Since our camper is aluminum-clad, we secured the brackets to studs and sealed the back and holes using putty/butyl tape to prevent leaks.
Step 2: Mount the Frame Supports
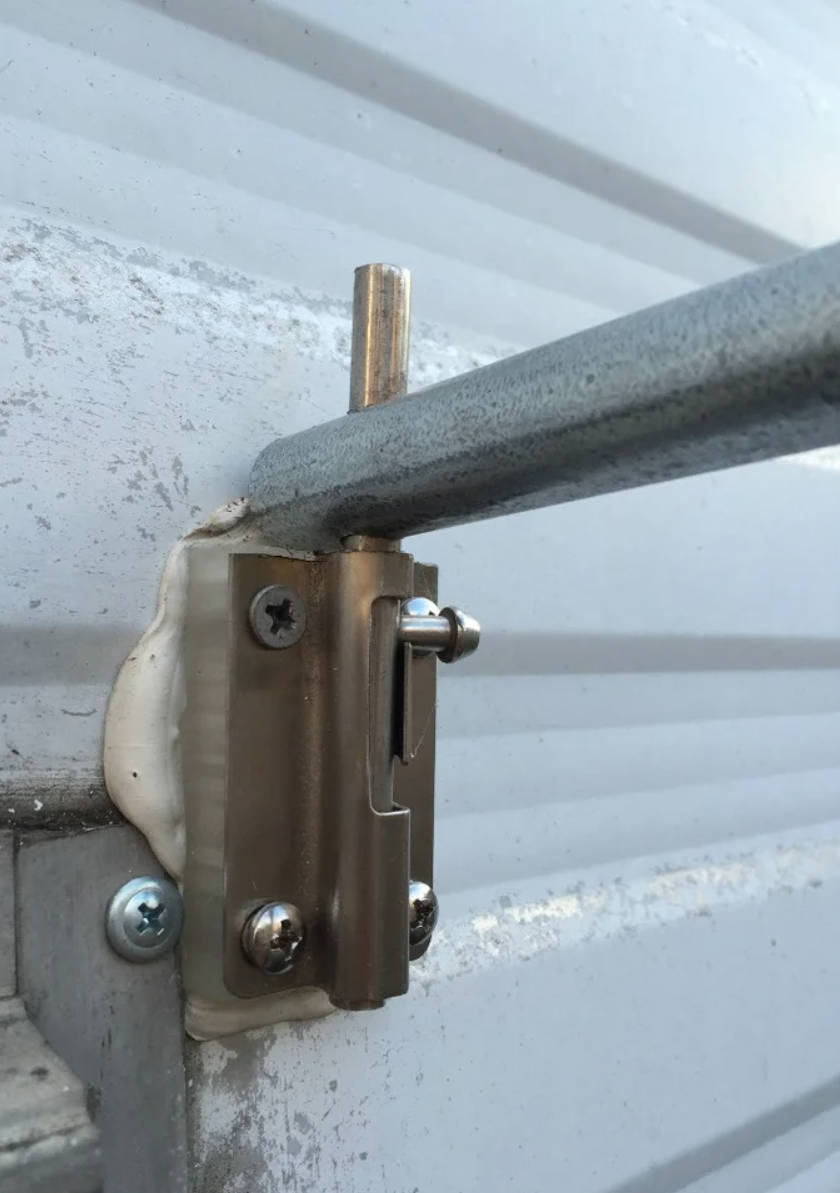
We used standard barrel latches, trimming the ends by 1/2″ with a Dremel to allow the barrels to extend approximately 1.25″ above the latch. To ensure a secure fit, we crafted custom ABS spacers using 3D printing. If you don’t have access to a 3D printer, wood spacers will work just as well.
To mount the barrel latches:
- Locate sturdy mounting points on the camper.
- Drill two new holes in the trimmed barrel latches to accommodate secure mounting.
- Apply butyl/putty tape and silicone around the drilled holes to create a waterproof seal.
Step 3: Drill Mounting Holes for the Frame

This is the most challenging part because the two bars need to be parallel and at the correct angle. It took a couple of tries to get it just right.
- Pull the barrel lock forward as much as possible to account for movement.
- Hold a length of 1/2″ electrical conduit against the camper and mark the angle with a Sharpie.
- Use a center punch to create a guide point—this makes drilling through curved surfaces much easier.
- Drill holes through the conduit, ensuring they match the barrel locks.
- Test the fit and make adjustments as necessary until the two 24″ tubes are aligned properly.
Step 4: Cut the Tubing and Assemble the Frame

Due to the limited space in our camper, we settled on a shower frame that is 24″ deep by 32″ wide. You can adjust these measurements to fit your setup.
- Cut the tubing to length and file down rough edges.
- Use 90-degree joints at the corners instead of bending the tubing to maintain accuracy.
- Replace one of the bolts in each joint with a thumb screw to allow easy assembly and disassembly.
- Secure the frame by screwing one joint to the left bar and one to the right side of the middle bar—this ensures consistent assembly without confusion.
Step 5: Hang the Curtain and Enjoy Your New Shower
- Attach the shower curtain to the frame using wire shower curtain rings.
- Step back and admire your work!
- Test the setup and make any necessary adjustments.
Note: To prevent the shower curtain from billowing in the wind, we plan to add clips to keep the two sections together. We’re also considering installing a snap or tether system to secure the curtain to the camper’s side.
Other Details Display
- Leak Prevention: We sealed all drill holes with butyl/putty tape and silicone.
- Collapsible Frame: The shower enclosure can be disassembled and stored compactly.
- Custom Fixtures: The upgraded High Sierra shower head and water saver valve ensure efficiency and durability.
- Secure Mounting: The use of spacers and barrel latches provides a sturdy yet removable frame for the enclosure.
Summary
Installing an outdoor shower in our 1967 Aljo Sportsman camper was a game-changer, providing a convenient and space-saving way to stay clean while camping. By carefully selecting materials, upgrading components, and ensuring a leak-free installation, we created a practical and stylish shower setup that enhances our vintage camper’s functionality.
This plan is a contribution by [SLOMakerSpace]. Project Via Instructables – Get the PDF Instructions here.