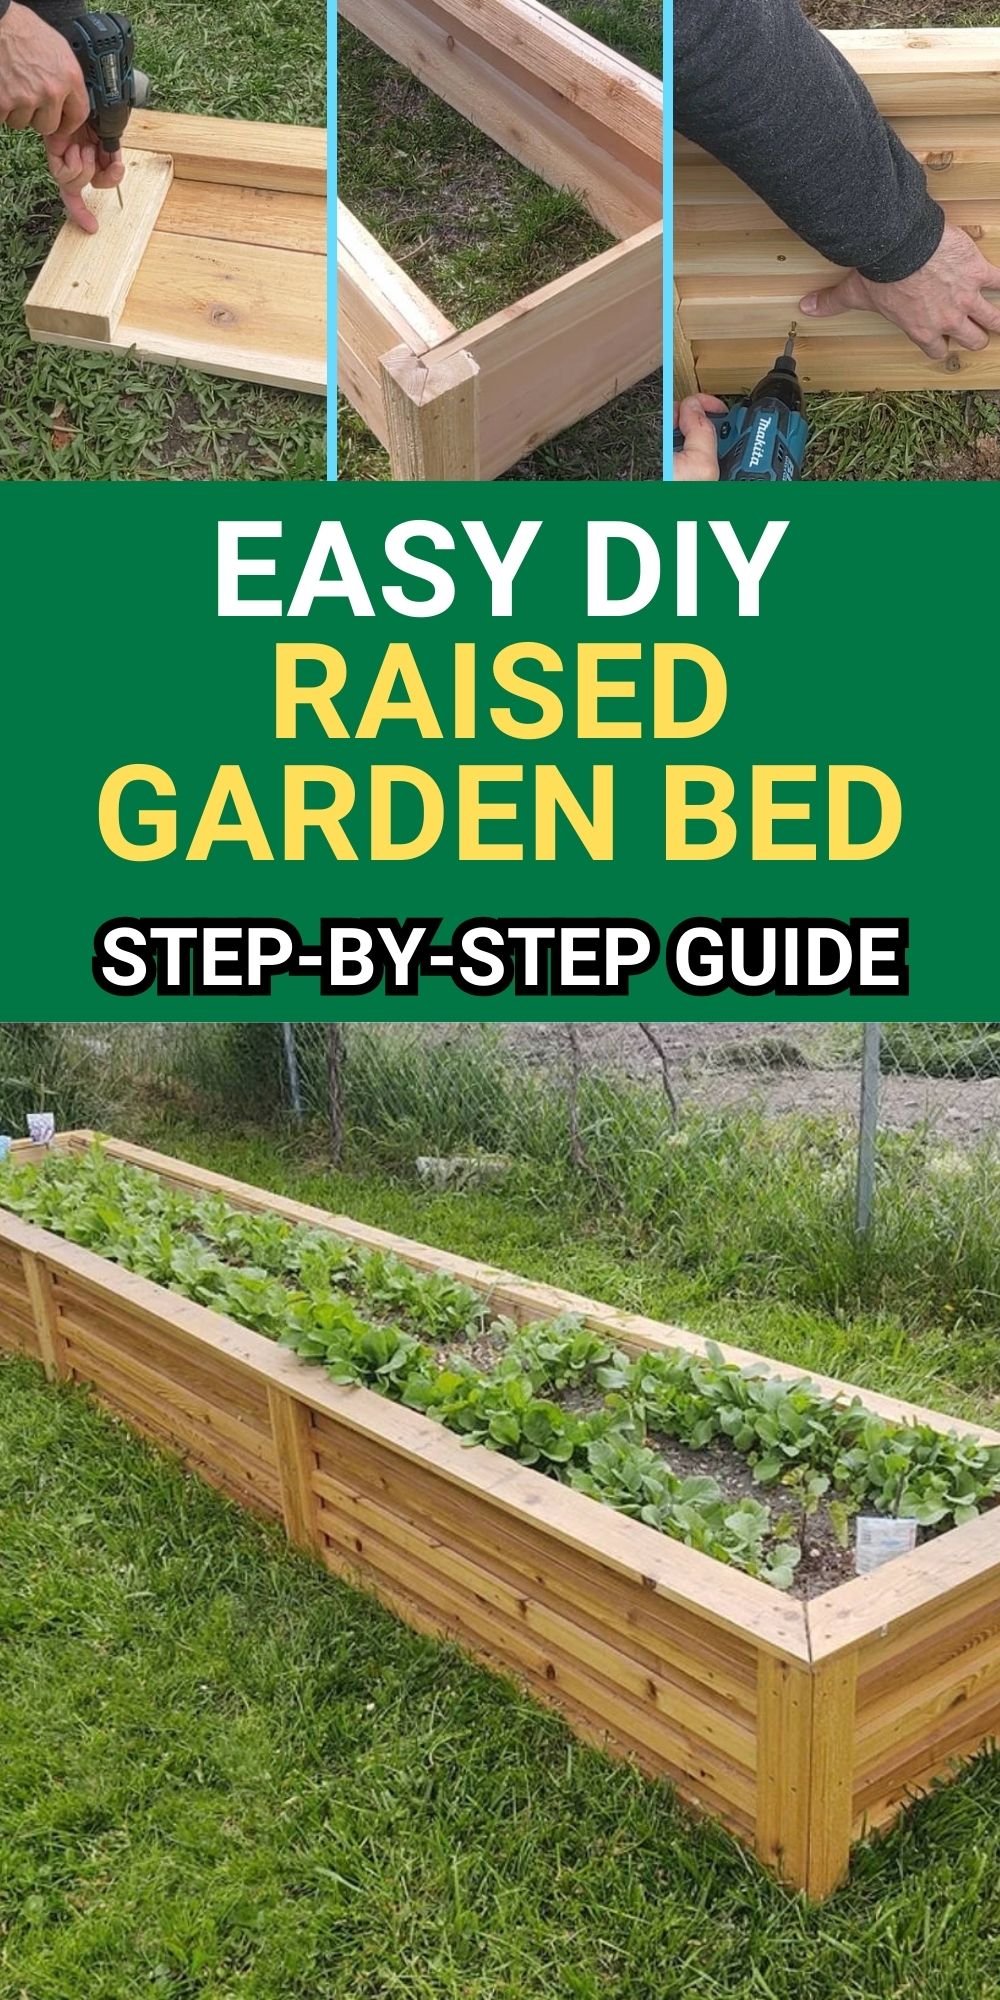
Springtime is here, and it’s the perfect season to start gardening! One of the best ways to improve your garden is by building a raised garden bed. Not only does it help with soil drainage and pest control, but it also adds a neat and organized look to your yard.

Instead of settling for a basic design, I decided to enhance mine with decorative elements to make it more visually appealing. This guide will take you through the step-by-step process of how I built my raised garden bed, ensuring that you can create one just as functional and stylish.
Why This Plan Works

- Improved Durability: Using rot-resistant cedar ensures the longevity of the garden bed without the need for chemical treatments.
- Better Drainage & Soil Quality: Raised beds prevent soil compaction and improve root growth.
- Enhanced Aesthetic Appeal: Adding decorative corner elements and horizontal slats creates a more refined and structured look.
- Customizable Size: While this tutorial covers a 12 ft x 2 ft design, you can adjust the measurements to fit your space.
- Step-by-Step Guide with Photos: Each step is detailed to make the process easy to follow, and pictures can be added at various points for reference.
What You Will Need
Safety Equipment
- Safety glasses
- Ear plugs
- Dust mask
Tools
- Tape measure
- Pencil
- Square
- Circular saw
- Impact driver
- 1/8-inch drill bit
Materials
Cedar Boards for Main Structure
- 7 – 1×8 boards (3/4″ x 7 1/4″)
- 4 – 2×4 boards (1 1/2″ x 3 1/2″)
Cedar Boards for Decorative Features
- 2 – 2×4 boards (1 1/2″ x 3 1/2″)
- 4 – 1×4 boards (3/4″ x 3 1/2″)
- 18 – 1×2 boards (3/4″ x 1 1/2″)
Screws
- 1 lb. 2” deck screws
- 1 lb. 1 1/4” deck screws
How to Make
Step 1: Choosing the Right Screws
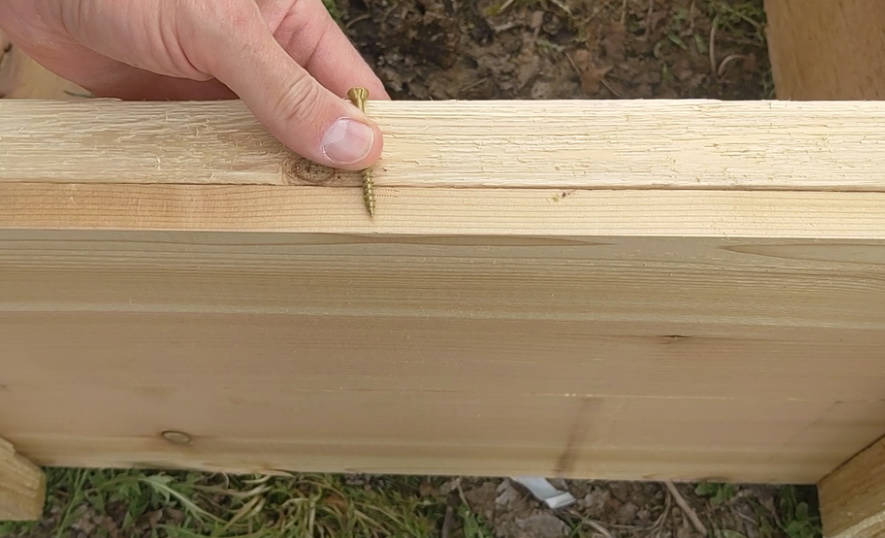
For this project, I used two different sizes of screws:
- 2-inch screws for securing 2×4 boards and attaching thick boards together.
- 1 1/4-inch screws for connecting thinner boards to each other.
Step 2: Building the Long Sides (Outside)
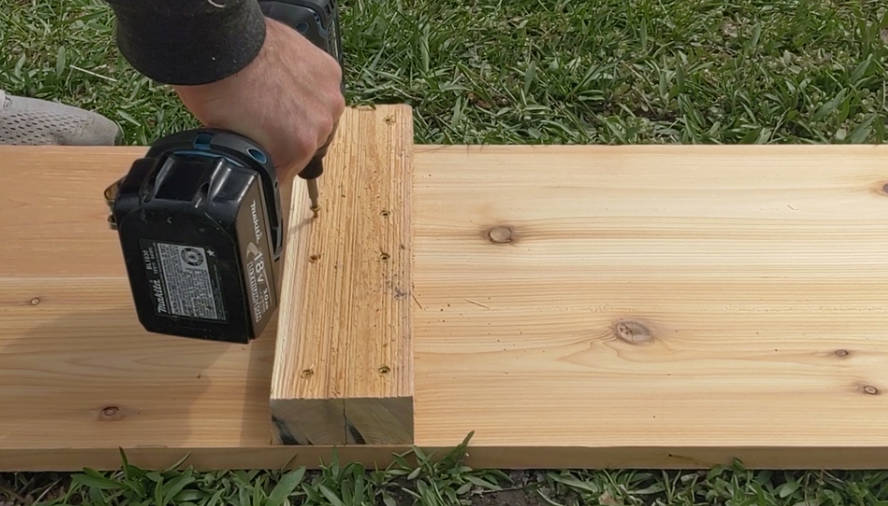
- Lay out the 1×8 boards in a staggered pattern to prevent weak joints.
- Cut one 1×8 board in half to create 4-ft sections.
- Assemble by attaching the 4-ft board next to an 8-ft board to create two rows.
- Cut 2×4 braces (14 1/2 inches long) and screw them into the joints to hold the boards together using 2-inch screws.
Step 3: Reinforcing the Long Sides (Inside)

- Flip over the assembled boards.
- Attach a full-length 8-ft 2×4 along the top.
- Add a 4-ft 2×4 parallel to it.
- Reinforce the ends with vertical 2×4 supports to improve stability.
- Repeat the process for both long sides.
Step 4: Adding the End Boards
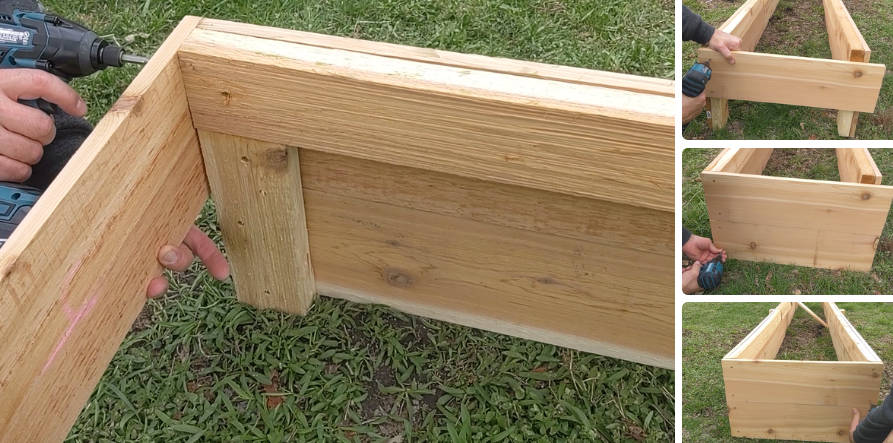
- Cut a 1×8 board into four equal 2-ft sections.
- Attach them to the 2×4 supports on the sides using either 1 1/4-inch or 2-inch screws.
Step 5: Securing the Corner Boards
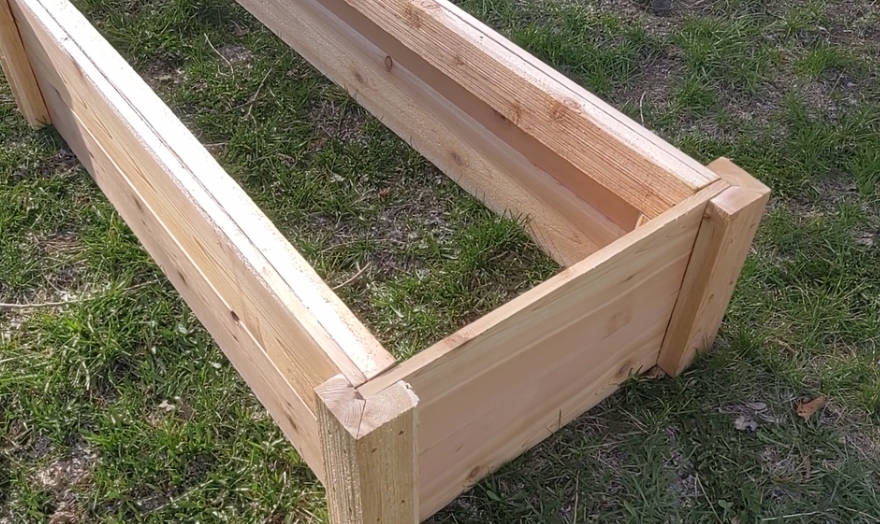
- Cut 2×4 corner boards at a 45-degree angle for a neat fit.
- Use existing screw holes to attach them without drilling extra holes.
- Fasten with 2-inch screws to create strong corners.
Step 6: Installing Horizontal Slats (Long Sides)
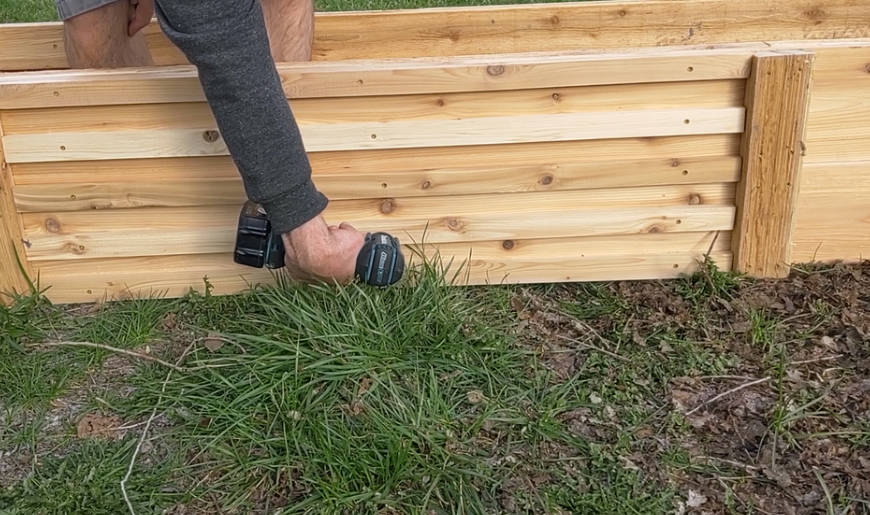
- Measure and cut 1×2 boards to fit between the vertical 2x4s.
- Each section should have five horizontal slats.
- Pre-drill pilot holes with a 1/8-inch drill bit to prevent splitting.
- Attach the top slat with 2-inch screws, while the remaining four slats use 1 1/4-inch screws.
Step 7: Ensuring Screws Are Aligned
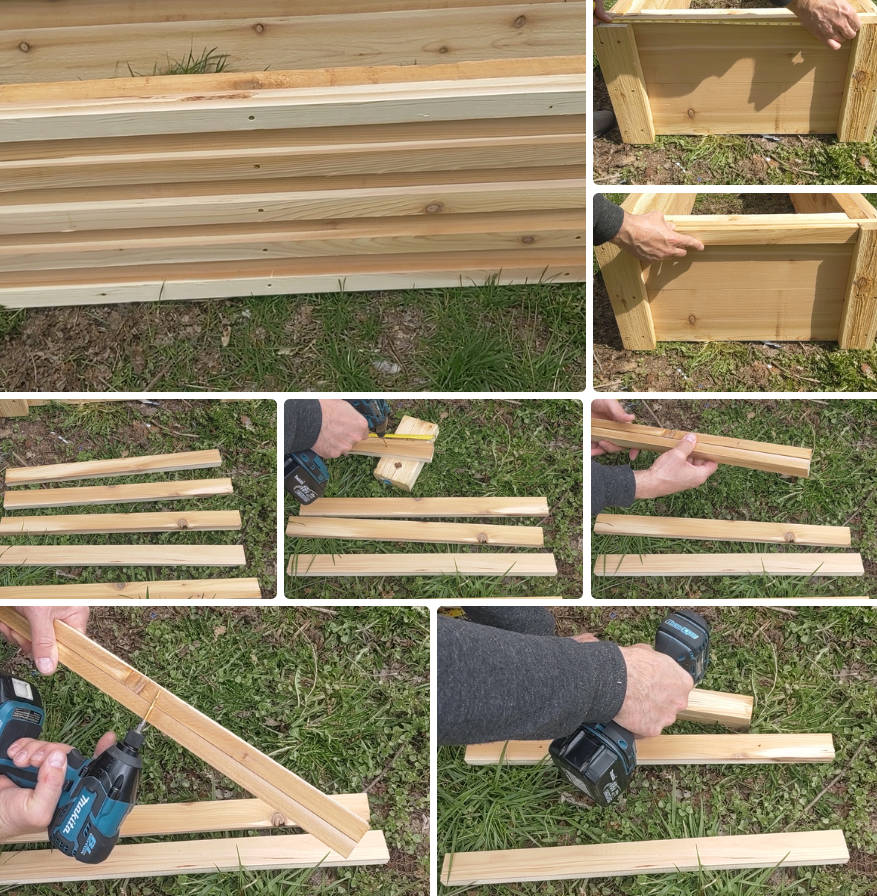
- To maintain a uniform appearance, measure and drill holes in one board first.
- Use this as a template for drilling the remaining boards.
- For long slats, drill three holes (4 inches from each end, one in the center).
- For short slats, drill two holes (4 inches from each end).
Step 8: Installing Horizontal Slats (Ends)

- Secure 2×4 reinforcement sections to the inside top of the box.
- Cut five horizontal slats per end, pre-drill holes, and attach.
- Follow the same screw placement pattern as with the long sides.
Step 9: Attaching the Top Boards
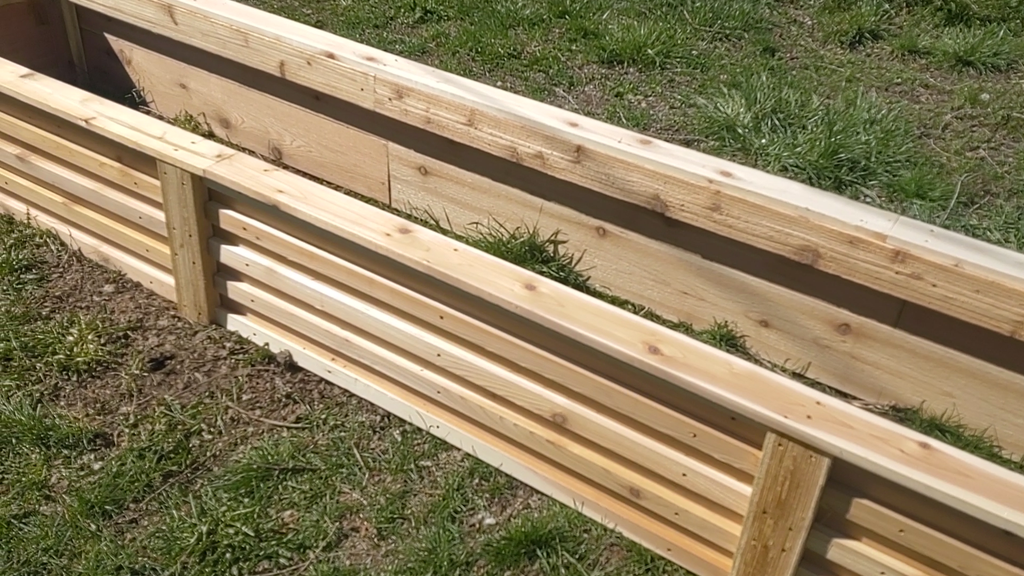
- Cut 1×4 boards to fit along the top of the structure.
- Cut ends at 45 degrees where they meet the corners for a polished look.
- Trim rough edges for a clean finish.
- Secure with screws to keep the boards in place.
Final Touches
- Ensure all screws are flush with the wood.
- Sand down any rough edges for a smooth finish.
- Move the bed to your desired location before filling it with soil.
Additional Details for Image Placement
- Step 2: Lay out and assemble long sides.
- Step 3: Flip over boards and add reinforcements.
- Step 4: Attach end boards.
- Step 5: Secure corners with decorative boards.
- Step 6-9: Add horizontal slats and top boards.
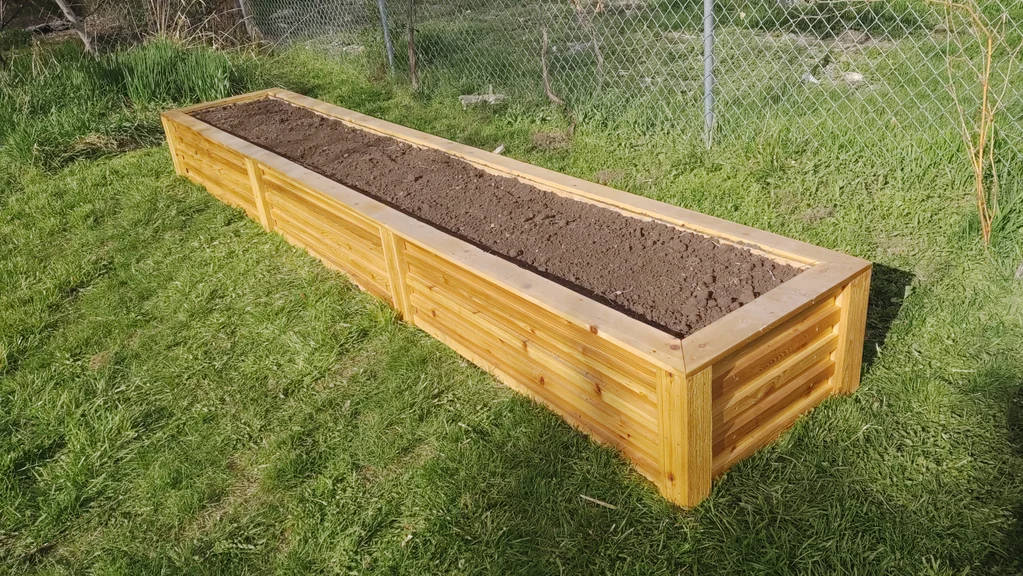
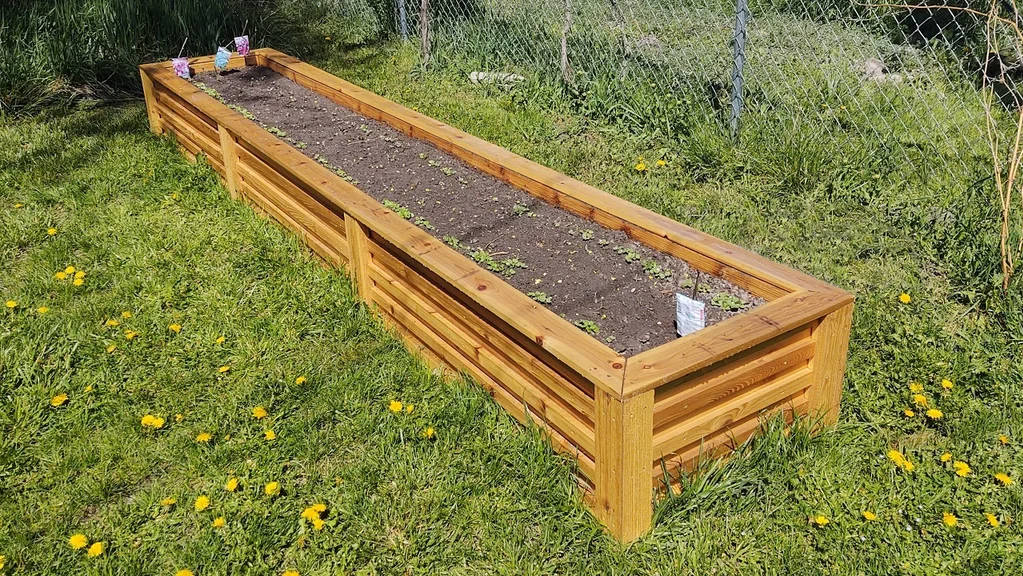
- Final Look: Fully assembled raised garden bed filled with soil.
Summary
Building a raised garden bed with a decorative touch is a rewarding DIY project that enhances any garden space. By using cedar wood, reinforcing corners, and adding stylish slats, you can create a durable and visually appealing structure. With these step-by-step instructions, you’ll have a beautiful and functional raised bed ready for planting in no time!
This plan is a contribution by [Tom]. Project Via Instructables – Get the PDF Instructions here.