Picture this: You’re throwing a backyard party at your beach house, and guests are coming in from the sandy shore. The last thing you want is a house full of sand on your freshly cleaned floors. The solution? An outdoor shower! But we’re not talking about an expensive setup.
Instead, we have a simple, budget-friendly, and eco-friendly solution—an outdoor solar-heated shower made from a black garden hose and an upcycled aluminum can as the showerhead.
This DIY project is not only functional but also a fantastic conversation starter at your party. Here’s how you can build it yourself in just a few simple steps.
Why This Plan Works

- Affordable: Uses inexpensive and upcycled materials.
- Easy to Build: Simple steps requiring basic tools.
- Eco-Friendly: Harnesses solar power for warm water.
- Great Conversation Starter: Guests will love the creativity!
What You Will Need

- (1x) 100-foot black garden hose
- (1x) Large shelf bracket
- (1x) Small shelf bracket
- (6x) 5/8″ stainless wood screws
- (1x) 3/4″ Male/Female garden hose fitting
- (1x) 3/4″ Male/Female garden hose fitting with valve
- (1x) O-ring hose washer
- (6x) 14″ black zip ties
- (1x) Aluminum can (e.g., Mike’s Harder Lemonade can)
- (1x) Bag of large smooth stones
- Cordless drill
- Box cutter with fresh blade
- Fine-tip Sharpie pen
- Wooden spoon or stick
How to Make It
Step 1: Prepare the Can
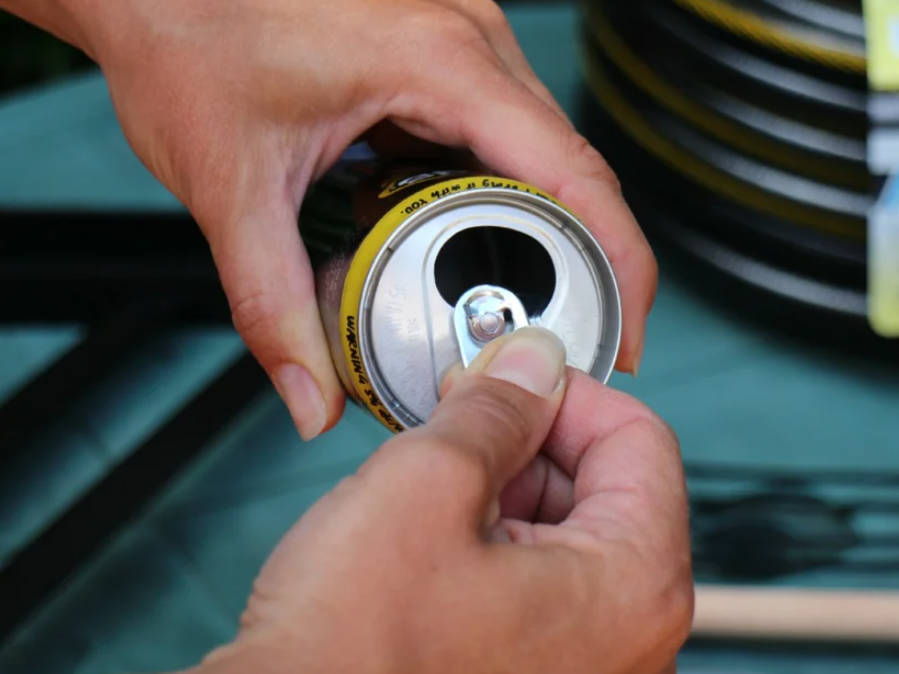
Remove the pull-tab from the empty can that will serve as your showerhead.
Step 2: Mark the Hole

Place the male threaded side of the hose fitting down on the can’s top, aligning it with the drink hole. Use a fine-tip Sharpie to trace the outline onto the can.
Step 3: Cut Out the Hole
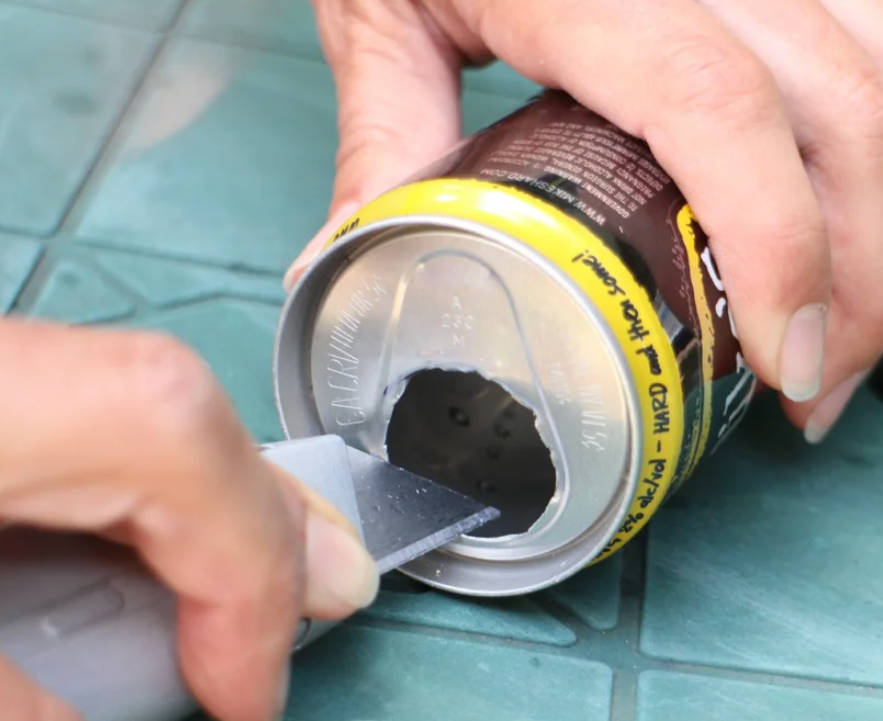
Using a box cutter, carefully shave away the metal until you have a cleanly cut hole matching your traced outline.
Step 4: Create Shower Holes
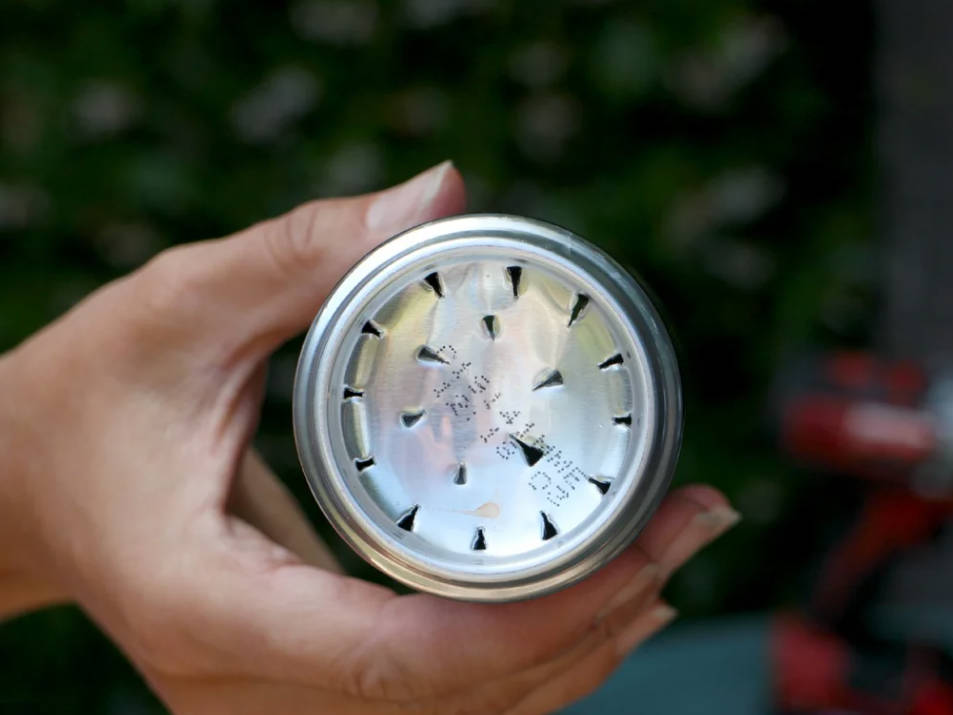
With the tip of the box cutter, puncture multiple small holes in the bottom of the can. Make an outer and inner ring of holes for even water flow.
Step 5: Adjust the Can Bottom

To ensure the water sprays outward, press a wooden spoon handle against the can’s bottom and gently press until a slight convex shape forms.
Step 6: Assemble the Showerhead

Take the hose fittings and O-ring. Screw them together, ensuring the valve fitting is on top. Insert the O-ring on the male threaded side of the non-valve fitting.
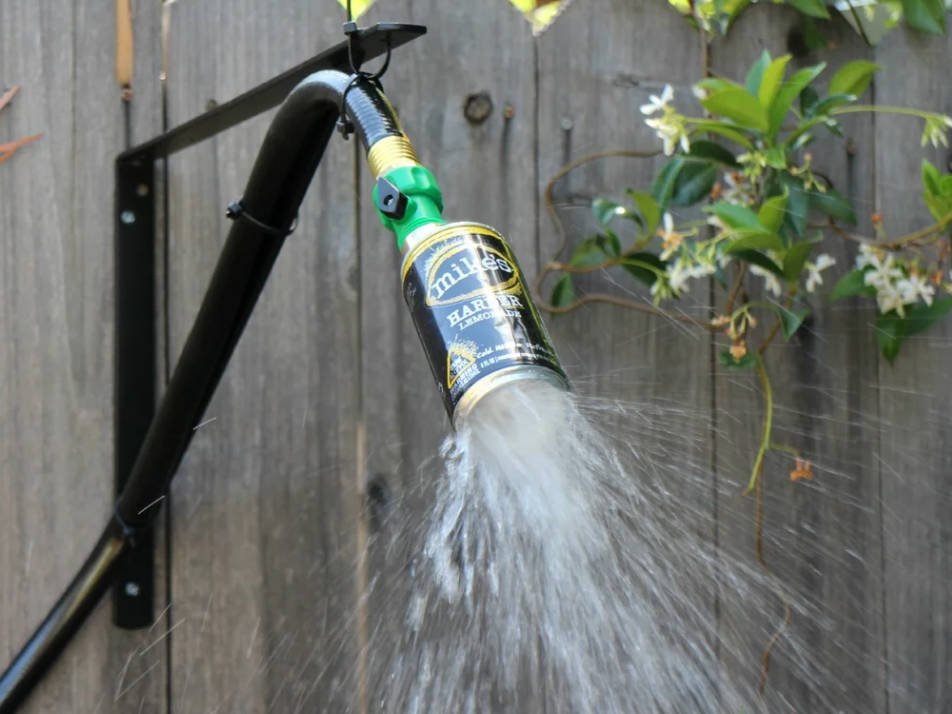
Step 7: Attach the Showerhead
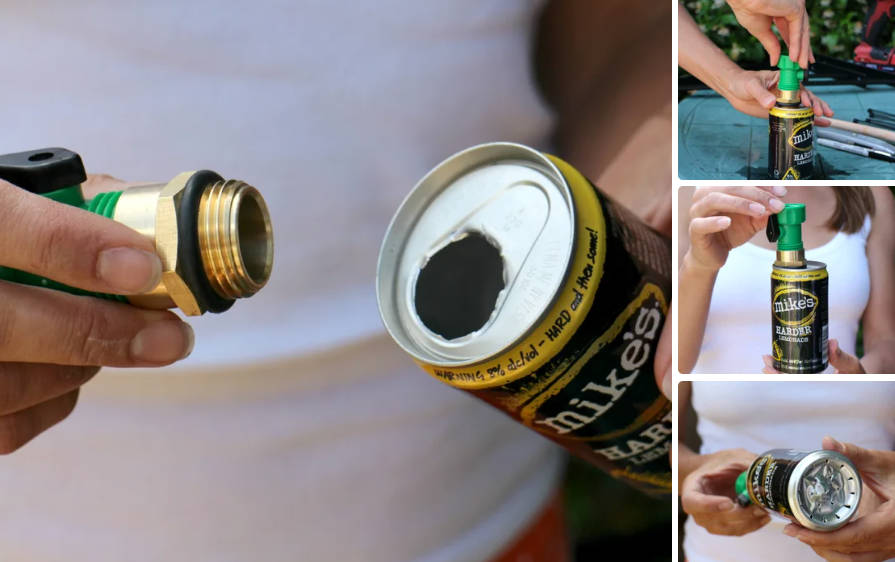
Carefully screw the fitting into the can’s hole until you see the O-ring slightly compressed. Your DIY showerhead is now ready for installation!
Step 8: Install the Brackets

- Find a fence or sturdy surface that gets morning sunlight.
- Use the drill and screws to secure the large bracket about 6 inches above your desired showerhead height.
- Attach the small bracket lower down near the water source.
Step 9: Mount the Hose

- Leave the 100-foot hose coiled on the small bracket.
- Uncoil one end to the water source (extend with another hose if needed).
- Connect the hose to the faucet.
- Uncoil the other end up the fence, through the large bracket, and down 4 inches.
Step 10: Secure the Hose
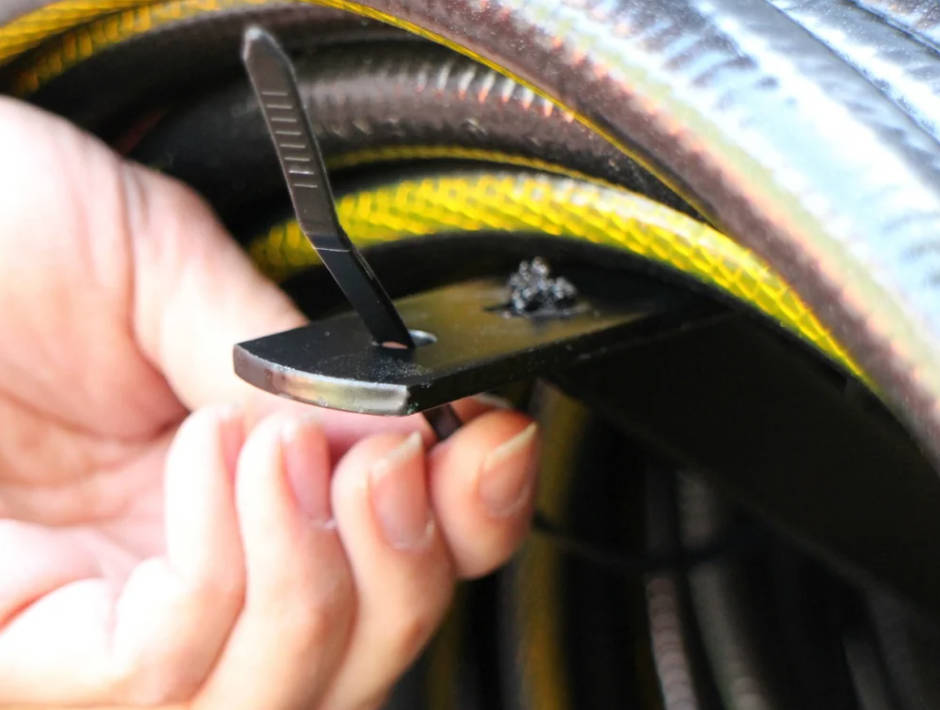
- Use zip ties to secure the hose at the base of the large bracket and midpoint.
- Double up zip ties to attach the hose to the bracket arm for extra stability.
Step 11: Attach the Showerhead

Screw the aluminum can showerhead onto the exposed hose end.
Step 12: Test the Water Flow

- Turn the faucet a quarter turn to avoid excessive pressure.
- Slowly open the showerhead valve to full.
- Observe where the water lands—this will determine where to place the stepping stones.
- Turn the water off.
Step 13: Create a Drainage Area

- Dump the smooth stones where the water lands.
- Spread them evenly to prevent muddy puddles.
Other Details Display
- Time Required: About 1 hour
- Estimated Cost: Under $50
- Ideal for: Beach houses, cabins, and outdoor spaces
- Sunlight Exposure: Ensures warm water by using a black hose for heat absorption
- Water Conservation Tip: Keep the showerhead valve closed when not in use
Summary
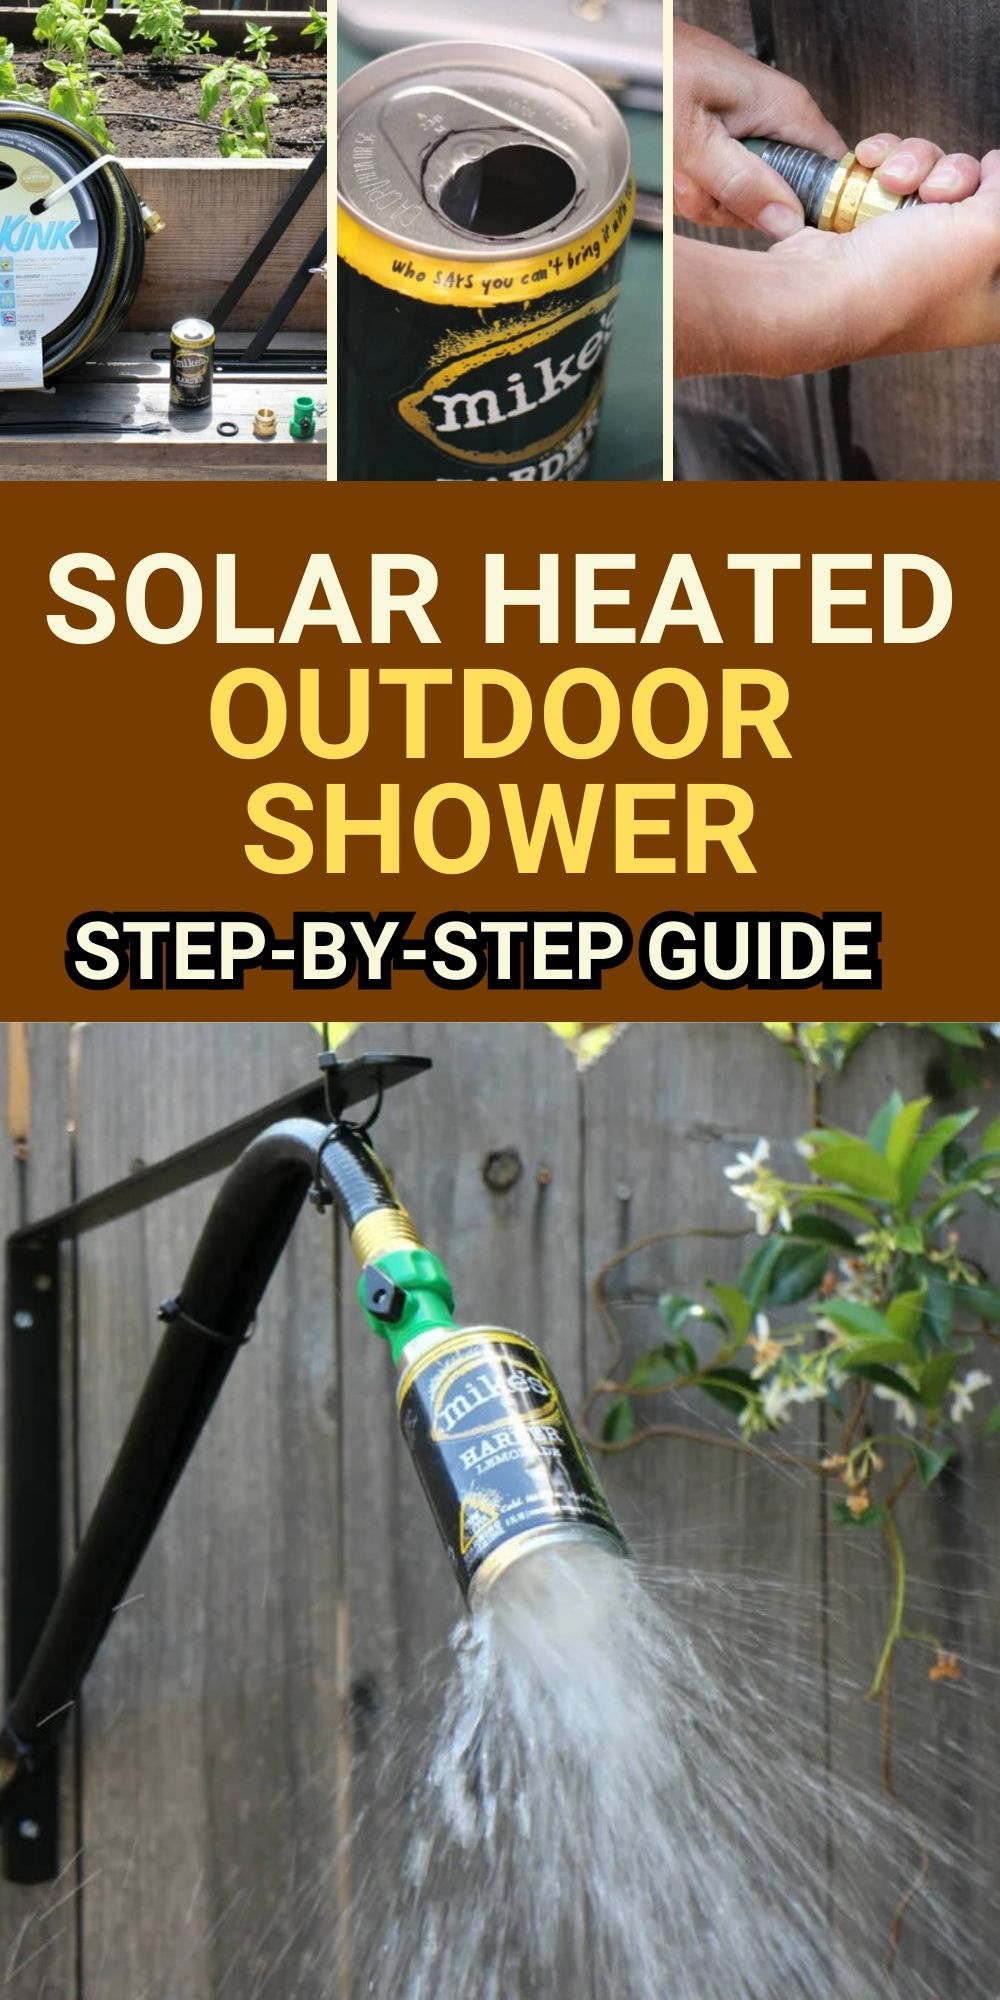
Building an eco-friendly, solar-heated outdoor shower is an easy and inexpensive way to keep sand and dirt outside your beach house. By using a black garden hose, upcycled aluminum can, and simple hardware, you can create a functional and fun conversation piece. This DIY outdoor shower is perfect for summer gatherings, ensuring your guests stay refreshed while keeping your indoor space clean. Happy building!
This plan is a contribution by [Paige Russell]. Project Via Instructables – Get the PDF Instructions here.