Gardening should be enjoyable, not backbreaking. I first got this idea from an older couple I know who built a raised garden bed to make gardening easier. Inspired by their design, I decided to create a larger version for myself.
My ground has a lot of clay, so raising my first garden bed about 10 inches off the ground made a significant difference. Later, I built a smaller one for my parents, ensuring they wouldn’t have to bend over as much while tending to their plants. The benefits are clear: no excessive bending, better drainage, and easier weed control.
Why This Plan Works

- Easier Gardening – Raised beds reduce the need for bending and kneeling, making them ideal for older individuals or those with mobility issues.
- Improved Drainage – Unlike traditional gardens, which can become waterlogged, this raised bed drains excess water efficiently.
- Customizable Size – This design can be adjusted to any dimensions that suit your space and needs.
- Better Soil Quality – If your ground has poor soil (like my clay-heavy yard), this method allows you to start fresh with quality soil.
- Long-Lasting Design – The sturdy construction ensures durability for many growing seasons.
What You Will Need
- (2) 2x8x12 boards
- (2) 2x8x8 boards
- (8) 2x8x8 boards (for joists)
- (10) 4×4 posts, 36 inches long
- (14) 1×6 deck boards
- (2) 2x6x8 boards
- (2) 2x8x12 boards (for interior framing)
- (4) 3-inch lag screws per leg
- 8mm plastic sheeting
- 1/4-inch drill bit
- Screws and nails
- (50) 1 cubic foot bags of topsoil
How to Make
Step 1: CAD Drawing

Before starting, I created a CAD drawing of my raised garden bed to ensure proper dimensions and material calculations. This step helps visualize the structure and allows adjustments before construction begins.
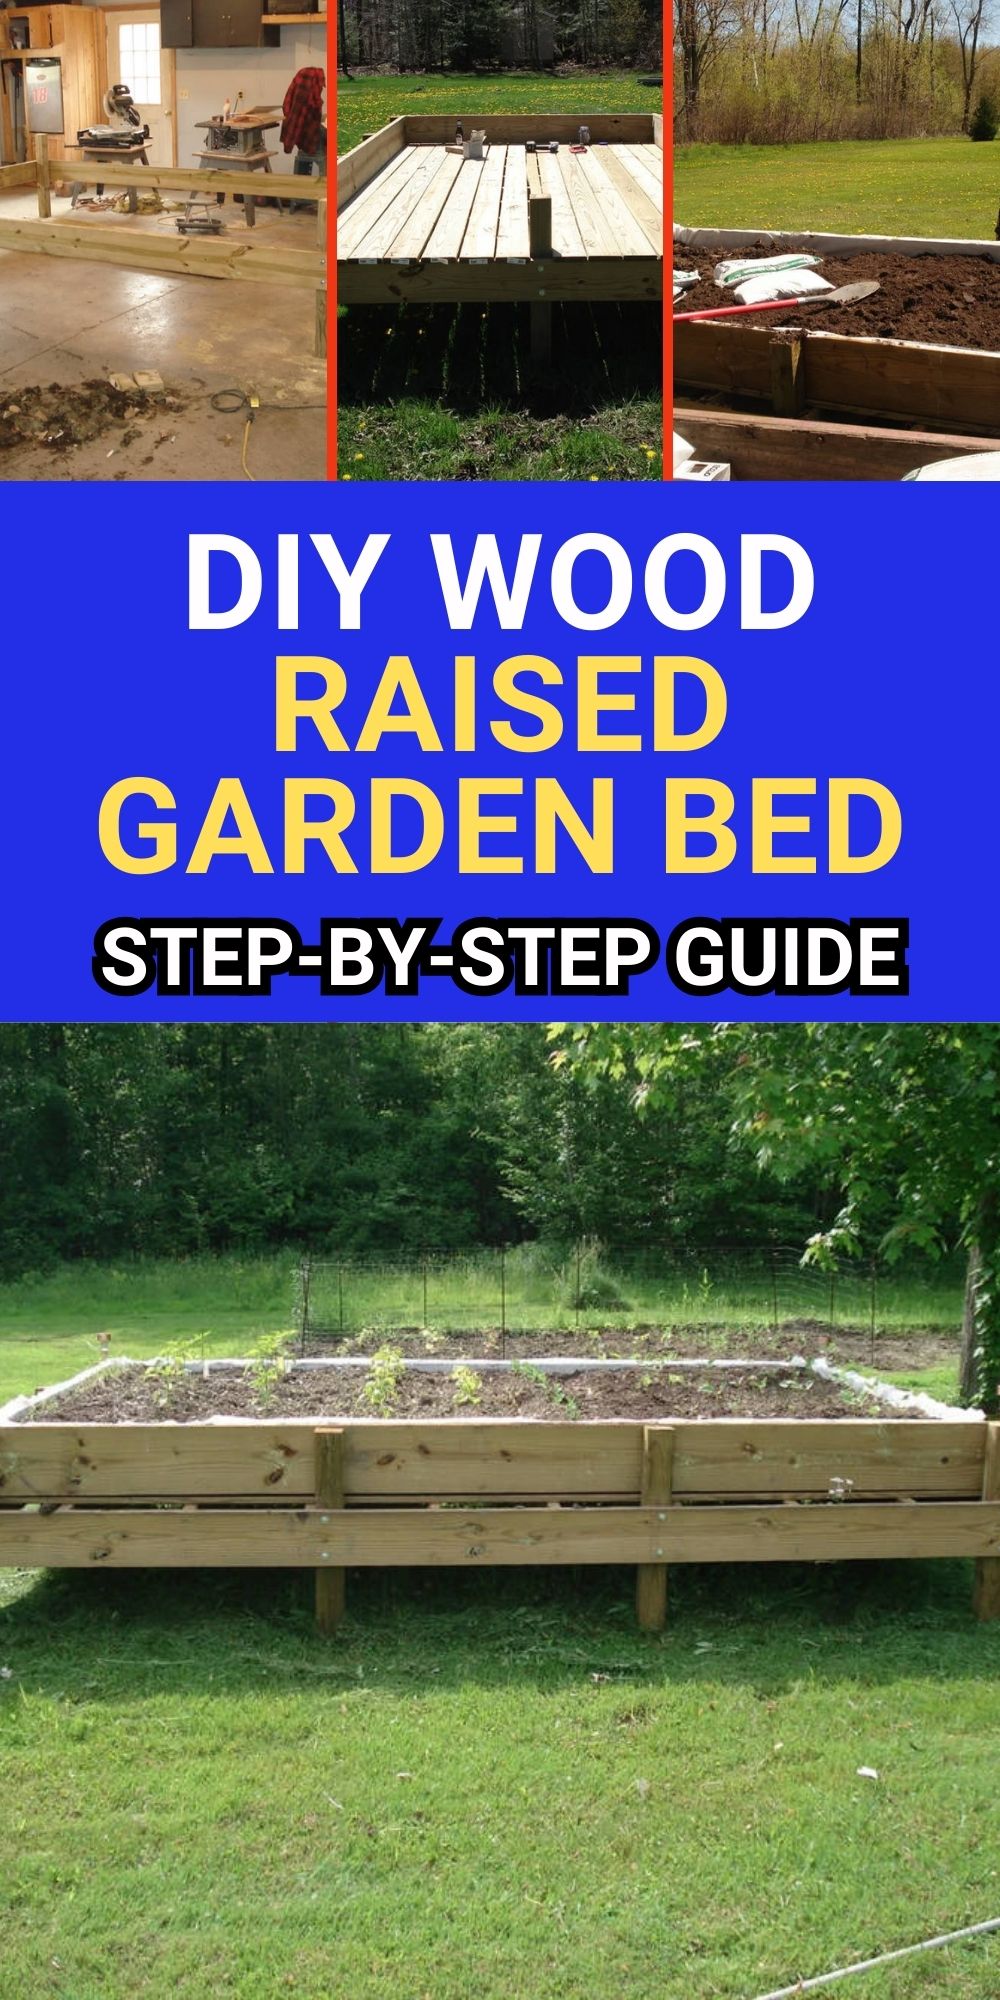
Step 2: Building the Legs and Outer Frame

To form the main structure:
- Cut (2) 2x8x12 boards and (2) 2x8x8 boards for the outer frame.
- Secure each corner with (4) 3-inch lag screws.
- Ensure the frame is level and square before proceeding.
Step 3: Installing the Joists

- I installed (8) 2x8x8 joists, placing them 16 inches apart for added strength.
- Each joist was securely nailed and screwed into place.
- This ensures stability and prevents soil from sagging over time.
Step 4: Attaching the 4×4 Legs
- Cut (10) 4×4 posts to 36 inches in length.
- Install them at each corner and along the centerline for additional support.
- These sturdy legs raise the bed to a comfortable working height.
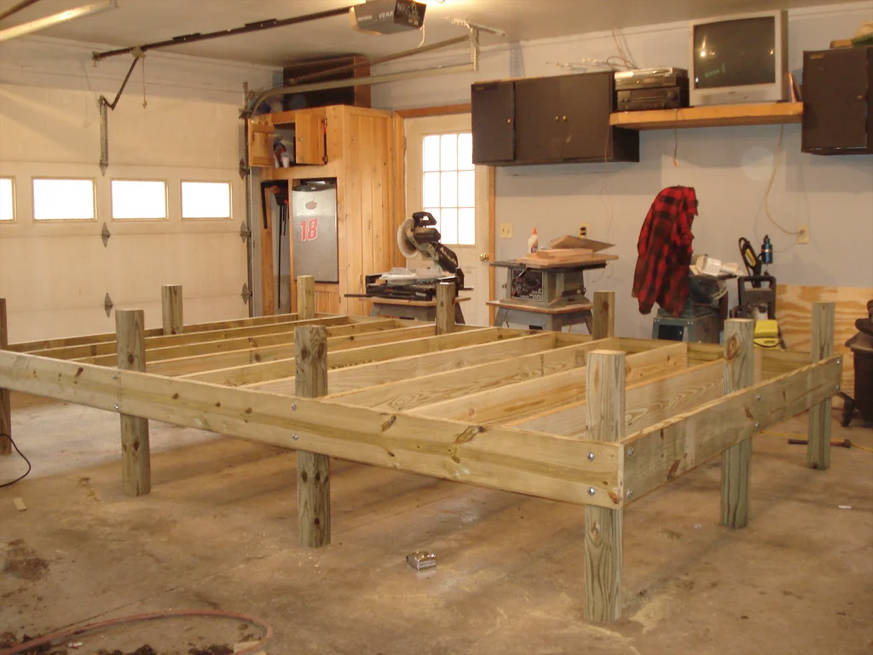
Step 5: Constructing the Bed Frame

- Secure (14) 1×6 deck boards across the joists to form the base.
- Ensure even spacing to prevent warping and allow proper support for soil weight.
Step 6: Preparing the Bed
- Attach (2) 2x6x8 and (2) 2x8x12 boards to the inside of the 4×4 legs to create the raised outer frame.
- Since I used pressure-treated wood for durability, I added a protective barrier.
- To prevent soil contact with treated wood, I doubled up 8mm plastic sheeting as a protective liner.
Step 7: Creating Drainage Holes

- Left a 3/4-inch gap between each deck board for natural drainage.
- Drilled 1/4-inch holes through the plastic liner every 4 inches to allow excess water to escape.
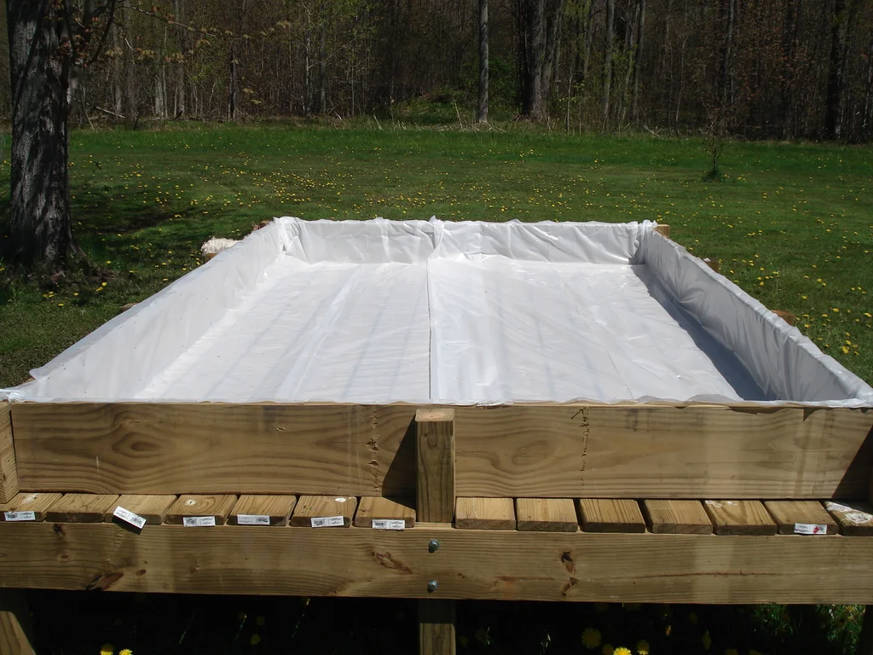
Step 8: Filling with Soil

- Purchased (50) 1-cubic-foot bags of topsoil to fill the bed.
- Spread the soil evenly, ensuring it settled properly within the frame.
Note: Using high-quality soil will improve plant growth and reduce the need for additional fertilizers.
Step 9: Completing the Raised Bed
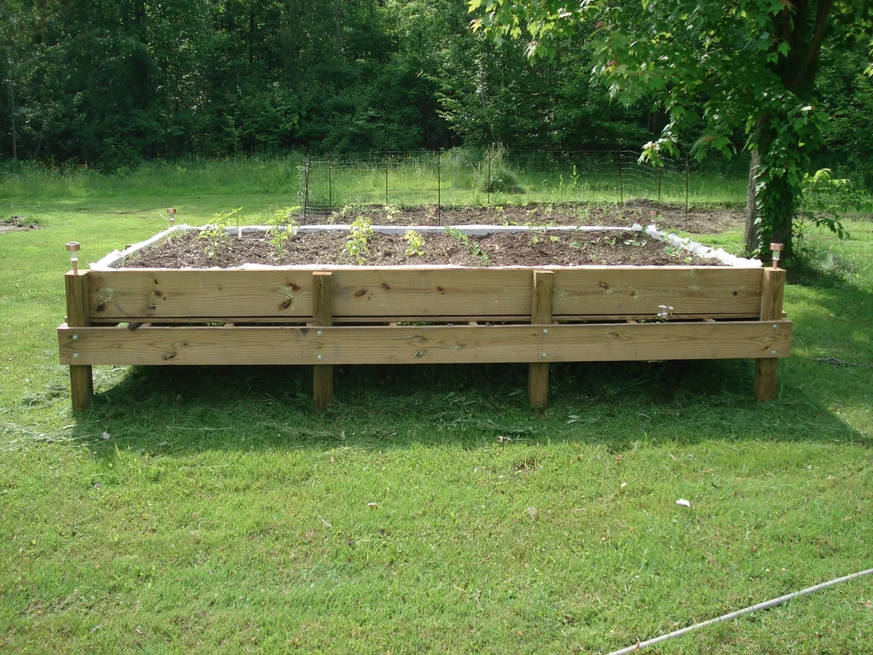
- Once the soil was added, the raised garden bed was ready for planting!
- This structure is ideal for vegetables, herbs, or flowers and requires minimal maintenance.
Other Details Display
- CAD Drawings: A blueprint was created before construction.
- Tools Used: Drill, saw, measuring tape, screws, and nails.
- Material Considerations: Pressure-treated wood for longevity, plastic liner for soil protection.
- Customization Options: The height and dimensions can be adjusted based on personal preferences.
Summary
Building a raised garden bed is a great way to enhance your gardening experience, especially if you struggle with poor soil or mobility issues. This step-by-step guide ensures you can create a durable, well-draining, and easy-to-maintain garden space. With proper planning and materials, your raised garden bed will provide fresh produce for years to come!
This plan is a contribution by [coolbeansbaby68]. Project Via Instructables – Get the PDF Instructions here.