Hatching your own poultry eggs at home can be a rewarding and cost-effective experience. Whether you’re incubating chicken, duck, turkey, or other domestic poultry eggs, you need either a broody hen or an incubator.

While commercial incubators are available for over $100, you can build your own functional, forced-air incubator for just a fraction of the cost using readily available materials. In this guide, we’ll show you how to construct a homemade incubator for around $30, ensuring a successful hatch.
Why This Plan Works
- Affordable: Costs significantly less than store-bought incubators.
- Easy to Assemble: Can be built in just a couple of hours using common household items.
- Effective Design: Maintains consistent temperature and humidity for successful hatching.
- Scalable: Can hold multiple eggs, depending on the size of your incubator.
- Reproducible: Uses a simple structure that can be modified as needed.
What You Will Need
Tools:
- Serrated knife or hacksaw blade
- Duct tape
- Electrical tape
- Scissors
- Tin snips
- Leather gloves
- Wire cutters
- Wire stripper
- Sharpie marker
- Vacuum cleaner
- Pencil (for marking eggs)
Materials:
- 1 styrofoam ice chest (thicker walls preferred)
- 1 bottle lamp assembly (or salvaged lamp base)
- 1 lower-element, single-pole water heater thermostat
- 1 25W bulb
- 1 12V transformer (from an old electronic device)
- 1 PC core fan (salvaged or purchased)
- 1 plastic or glass panel (from an old picture frame)
- 1 shallow dish (for humidity control)
- Wire hardware cloth
- Aluminum foil
- 1 indoor/outdoor probe thermometer/hygrometer
- ½ cup salt
- ¼ cup water
- Large zip-close plastic bag
- 1 Mag-Lite flashlight (for candling)
- Fresh fertilized eggs (not refrigerated)
- Spray bottle with water (for humidity control)
How to Make Your Incubator
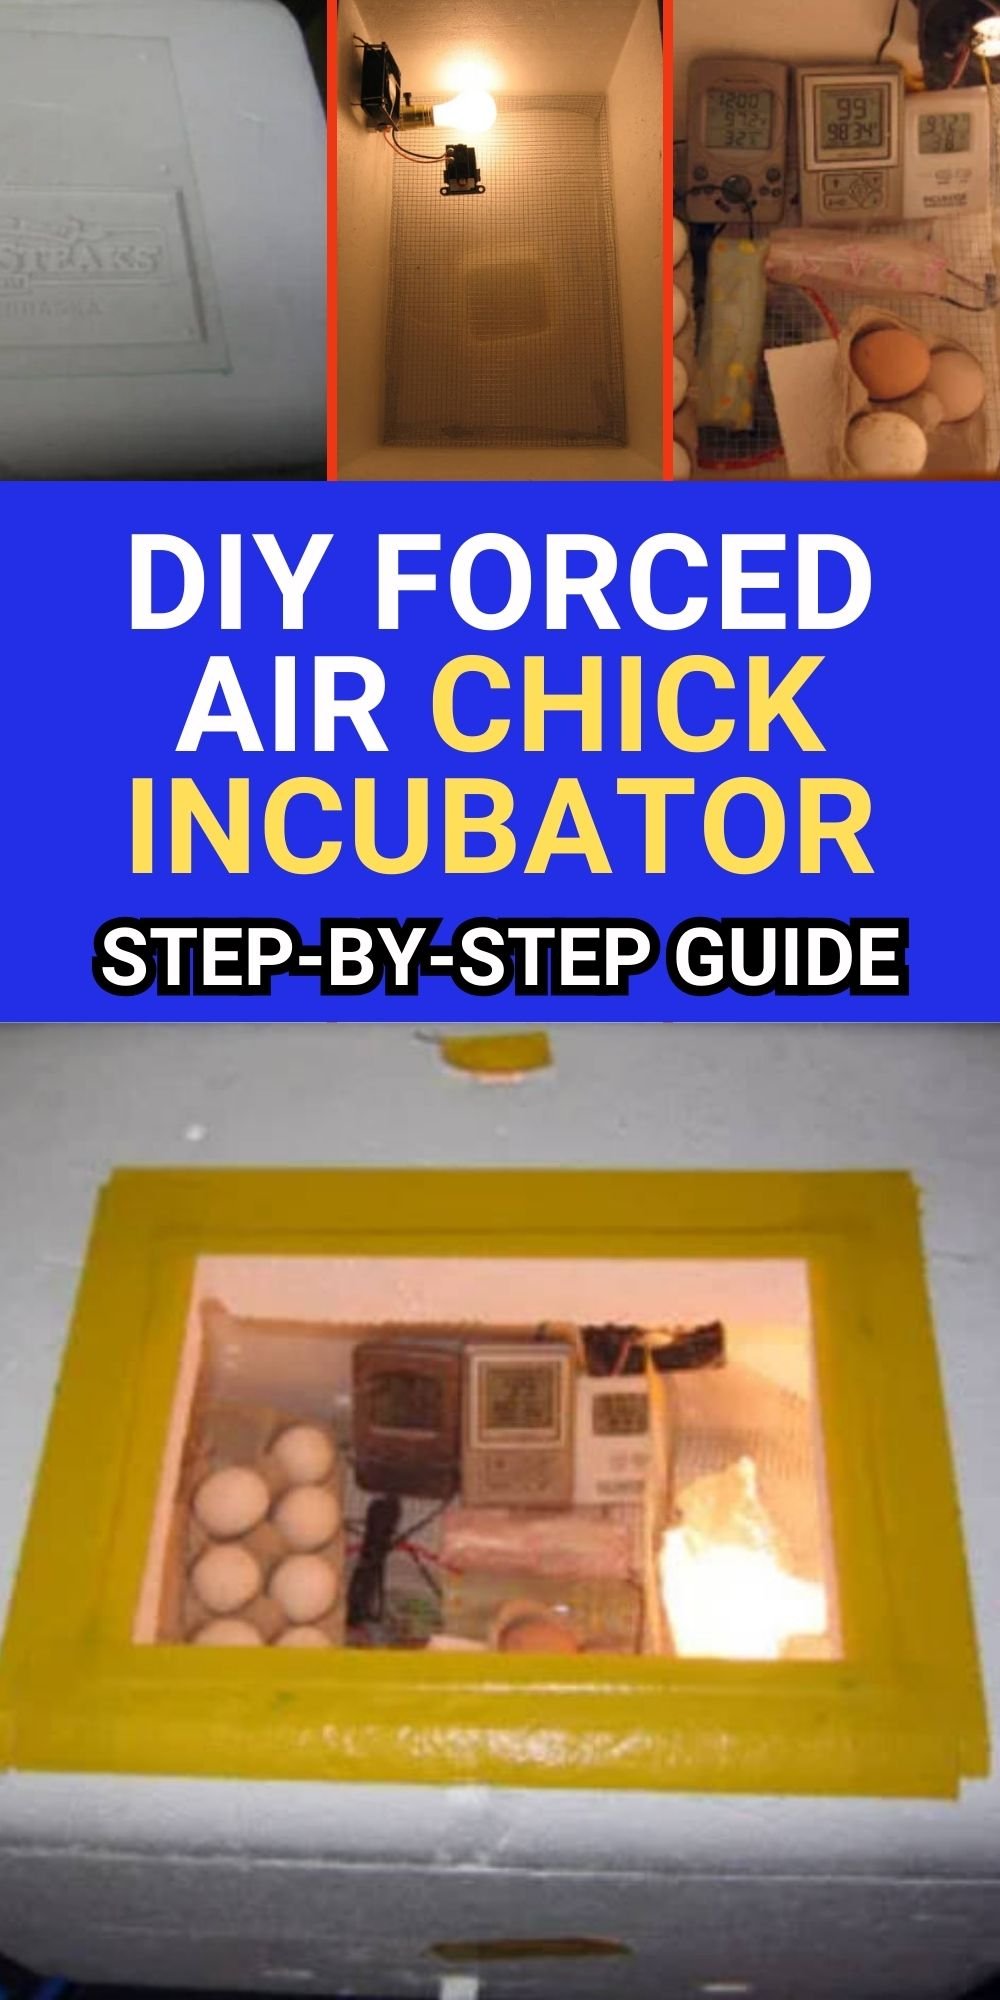
Step 1: Install the Viewing Window

Cut a window into the lid of your styrofoam cooler using a serrated knife or hacksaw blade. The cut should be at least ½ inch smaller than your plastic or glass panel to allow for a secure fit. Tape the panel in place with duct tape to create a clear viewing window.
Step 2: Install the Heat Source and Thermostat

- Cut a hole near the bottom of the cooler and insert the lamp assembly.
- If your lamp base lacks a side hole for wiring, drill one.
- Split the lamp wire, stripping the ends.
- Wire the thermostat following the proper circuit diagram:
- Attach the non-ribbed wire to terminal #1 on the thermostat.
- Run an additional wire from terminal #2 to the brass terminal of the lamp base.
- Connect the ribbed wire to the silver terminal of the lamp base.
- Cover exposed terminals with electrical tape for safety.
- Plug in the lamp and ensure it turns on and off based on the thermostat setting.
Step 3: Install the Fan for Air Circulation

- Attach a small PC fan inside the incubator to circulate warm air.
- Use hot glue or wire to mount the fan so that it blows air over the light bulb.
- Run the fan wires outside the cooler and connect them to the 12V transformer.
- Secure with electrical tape and test the fan to ensure smooth operation.
Step 4: Calibrate Your Thermometer and Hygrometer

- Mix ½ cup salt with ¼ cup water to create a slurry.
- Place the hygrometer in a sealed plastic bag with the salt solution.
- Leave it for several hours; it should read 75% humidity.
- Adjust future readings accordingly if there is any deviation.
Step 5: Create the Wire Floor

- Cut a piece of wire hardware cloth to fit the bottom of the incubator.
- Fold the edges to create a 2-inch raised platform.
- Place a shallow water dish beneath the wire floor to regulate humidity.
Step 6: Secure the Heat Source and Fan

- Cut an 8-inch tall piece of hardware cloth to form a safety barrier around the light bulb and thermostat.
- Cover the edge with duct tape to prevent sharp ends from injuring chicks.
- Insert aluminum foil between the bulb and eggs to diffuse heat evenly.
Step 7: Cut Ventilation Holes

- Cut at least four ½- to 1-inch ventilation holes near the level of the wire floor.
- Reserve the removed styrofoam pieces to adjust airflow later.
- Optionally, add a covered hole in the lid to regulate humidity.
Step 8: Add Water for Humidity

- Fill the shallow dish with warm water after assembling the incubator.
- Maintain 50% humidity for the first 18 days and 70% humidity during the final 3 days.
- Use a spray bottle to increase humidity if needed.
Step 9: Test and Stabilize the Incubator

- Run the incubator for at least 48 hours before adding eggs.
- Monitor and adjust temperature (99-100°F) and humidity levels.
- Fine-tune thermostat settings to ensure stable conditions.
Step 10: Add Eggs and Begin Incubation

- Place fertilized eggs on their sides or upright in egg cartons.
- Turn eggs at least twice a day to prevent embryos from sticking to the shell.
- Stop turning eggs on day 18 and increase humidity to 70%.
- Avoid opening the incubator unnecessarily during the final days.
Step 11: Candle the Eggs

- At 4-5 days, candle eggs with a bright flashlight to check for veining.
- Remove any non-developing eggs to prevent contamination.
- Continue candling every few days to monitor progress.
Step 12: Hatch and Welcome Your Chicks
- Chicks should begin hatching around day 21.
- If eggs don’t hatch immediately, wait until day 22 or 23 before intervening.
- Keep the incubator closed until all chicks have hatched to maintain humidity.
- Once hatched, allow chicks to dry and fluff up before moving them to a brooder.
Additional Details for Setup
- Incubator Size: Can hold 2 dozen eggs or more depending on design.
- Turning Options: Either manually turn eggs or use egg cartons for tilting.
- Temperature Tolerance: Aim for 99-100°F for optimal hatch rates.
- Hygrometer Readings: Adjust for any calibration offsets.
- Humidity Control: Use water bowls and ventilation holes for fine-tuning.
Summary
Building a DIY forced-air incubator is a cost-effective way to hatch poultry eggs at home. With a stable temperature of 99-100°F and proper humidity control, your homemade incubator can successfully hatch chicks. Patience and careful monitoring are key to ensuring a high hatch rate. Happy hatching!
This plan is a contribution by [chotii]. Project Via Instructables – Get the PDF Instructions here.