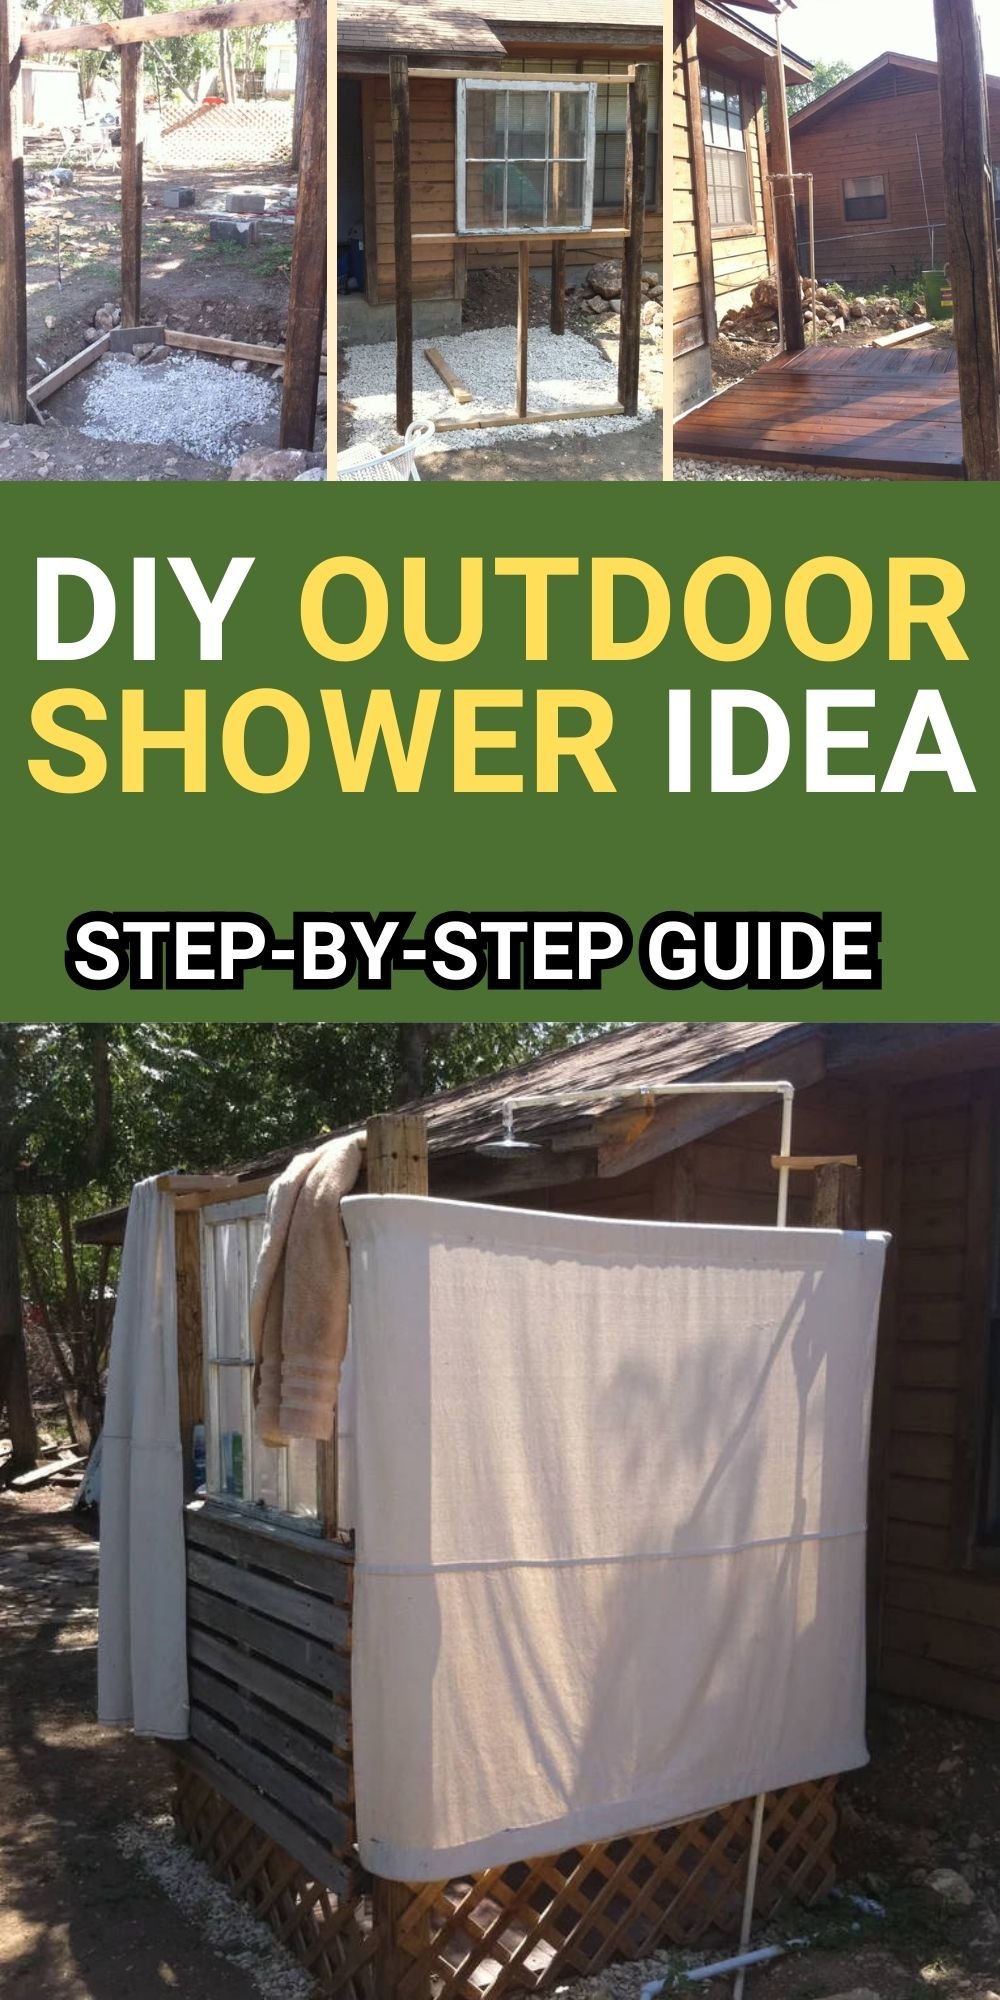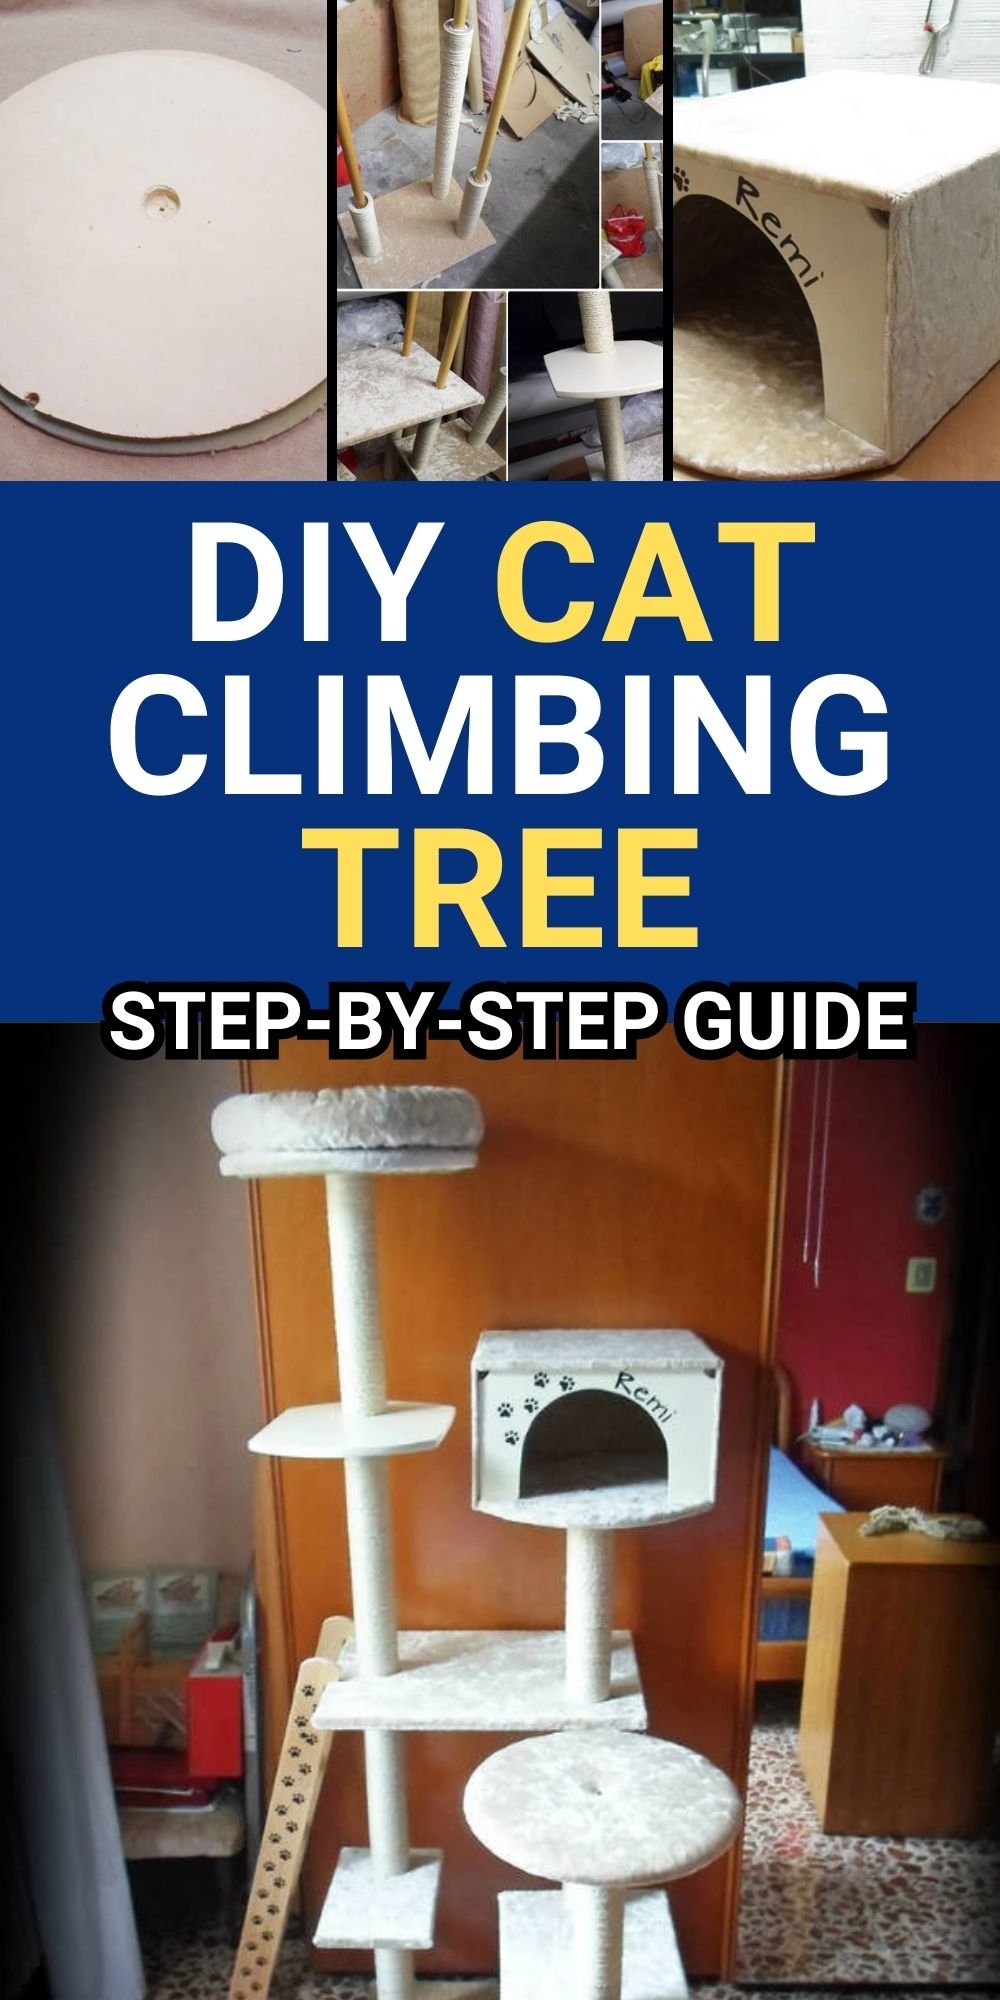
Creating a beautiful, custom cat tree doesn’t have to cost a fortune. When I first saw a massive cat tree in a store, I was inspired to make my own—for free!

Using materials I already had, I built a sturdy and stylish cat tree at a fraction of the cost. Even if you don’t have all the materials on hand, you can easily gather them for just a few dollars.
Why This DIY Cat Tree Works

- Budget-friendly – Save money by using repurposed materials.
- Customizable – Personalize the design, size, and colors.
- Eco-friendly – Reduce waste by upcycling materials.
- Cat-approved – Offers plenty of climbing, scratching, and resting spots.
What You Will Need
- Various wood pieces (details below)
- Thick cardboard tubes (found near factories, discarded as waste)
- Curtain wooden rods (diameter: 1.18 inches)
- Thick Styrofoam
- Velvet/plush fabric
- Upholstery foam (0.78 inches thick)
- Screws, thin nails, staple gun, upholstery batting
- Twine (for scratching posts)
- Wood primer, paint, brushes, sandpaper
- Super glue, hot glue, white glue, Velcro
- Tools: jigsaw, drill with hole cutter, screwdriver, scissors, sewing machine
How to Make a DIY Cat Tree
Step 1: Cut the Base Pieces
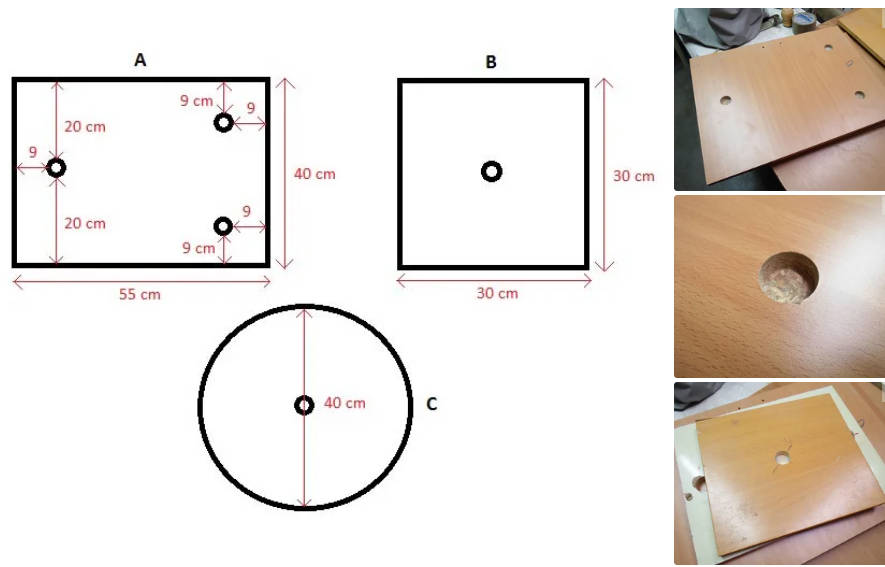
Cut two wooden base pieces:
- Piece A (Rectangle) – 21.65 x 15.74 inches with three “half holes” (do not drill through completely).
- Piece B (Square) – 11.81 x 11.81 inches with one “half hole” in the center.
Sand each wooden piece for a smooth finish.
Step 2: Cut the Top Pieces

- Two round pieces (C) – 15.74 inches in diameter, each with a center “half hole.”
- Cat house components (explained in Step 10).
Step 3: Cut the Rods
- 1 rod: 33.46 inches
- 1 rod: 69.11 inches
- 2 rods: 47.24 inches
Step 4: Cut the Middle Pieces
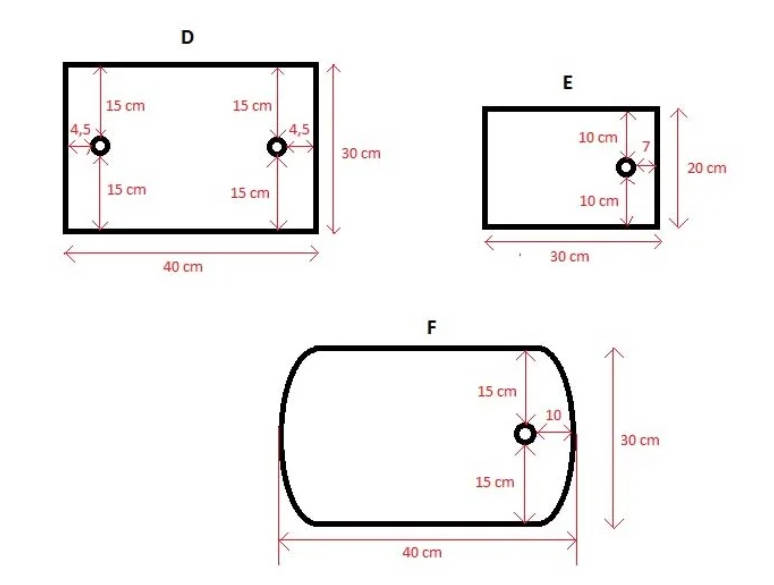
- Piece D – 15.74 x 11.81 inches with two through-holes.
- Piece E – 11.81 x 7.84 inches with one through-hole.
- Piece F – Similar to Piece D but rounded edges.
- Piece G – Identical to Piece A but with through-holes instead of “half holes.”
Step 5: Upholster the Wooden Pieces

- Cut fabric and upholstery foam to match each piece.
- Wrap the fabric tightly, staple it in place.
- Cut openings where the “half holes” and through-holes are located.
Step 6: Prepare the Cardboard Tubes
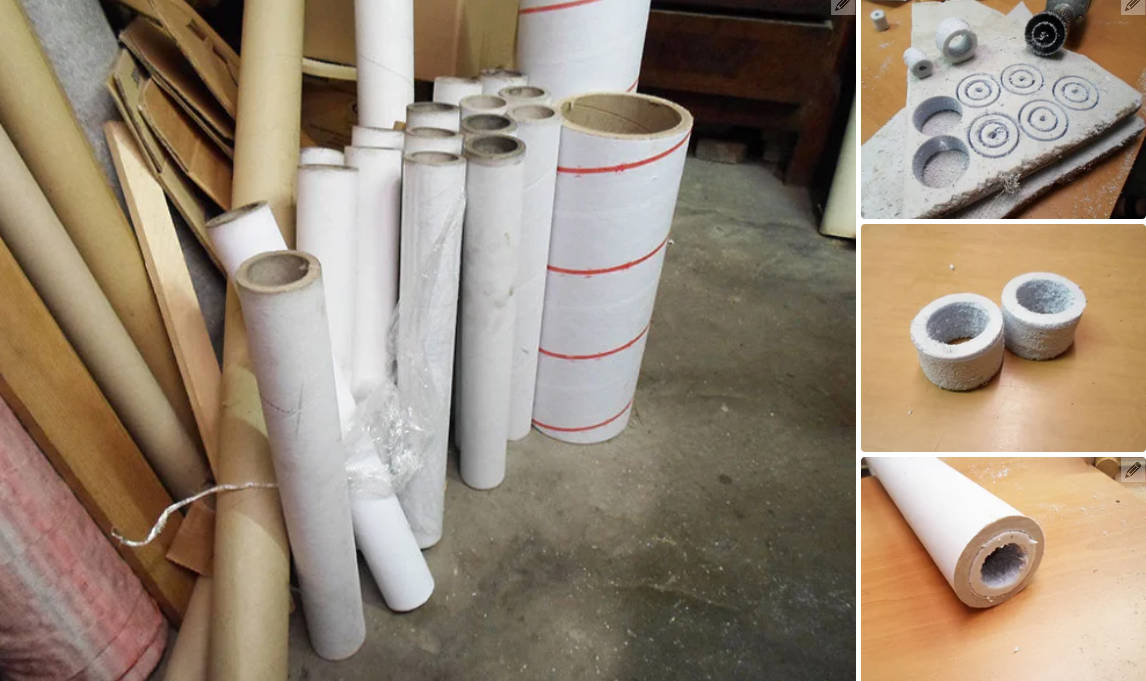
- Tube sizes:
- Six tubes: 15.74 inches
- One tube: 32.28 inches
- Two tubes: 13.77 inches
- One tube: 18.11 inches
- One tube: 14.96 inches
- Secure foam inserts inside tubes for stability.
Step 7: Cover the Tubes With Twine

- Secure one end of the twine with glue or tape.
- Wrap tightly around the tube.
- Use either glue or double-sided tape for adherence.
Step 8: Cut the Cat House Pieces
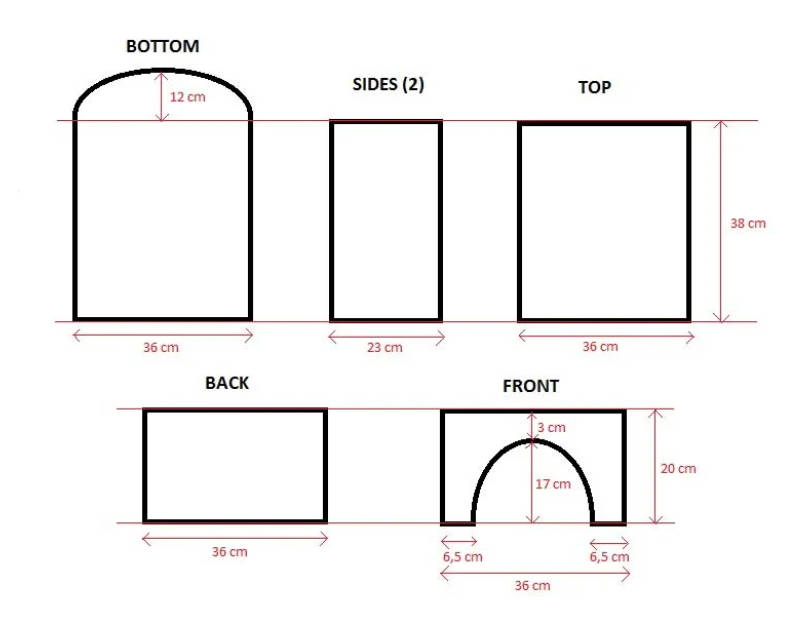
- Bottom: 19.68 x 14.17 inches (one rounded side).
- Sides: 14.96 x 9 inches.
- Top: 14.96 x 14.17 inches.
- Back & front: 14.17 x 7.87 inches (front includes a round entrance cutout).
Step 9: Decorate the Front
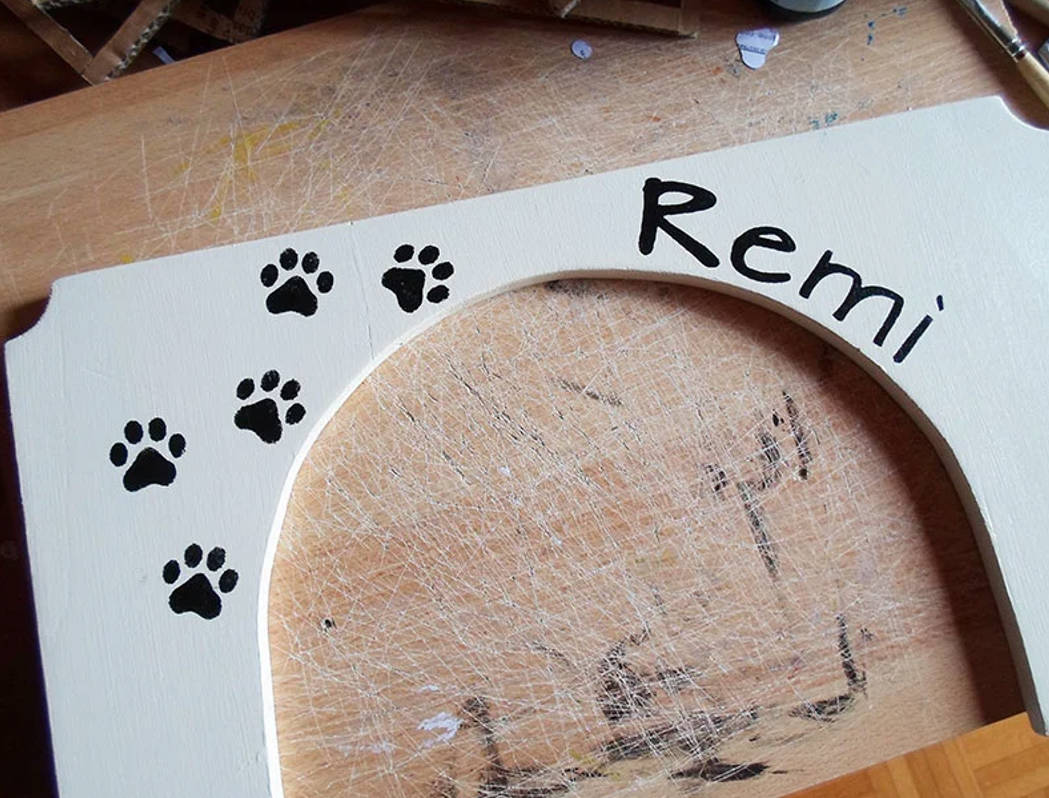
- Create a stencil with paw prints or your cat’s name.
- Paint using a sponge or small brush.
Step 10: Assemble the Cat House

- Nail the pieces together, forming a sturdy box.
- Attach the decorated front piece.
Step 11: Build a Ladder
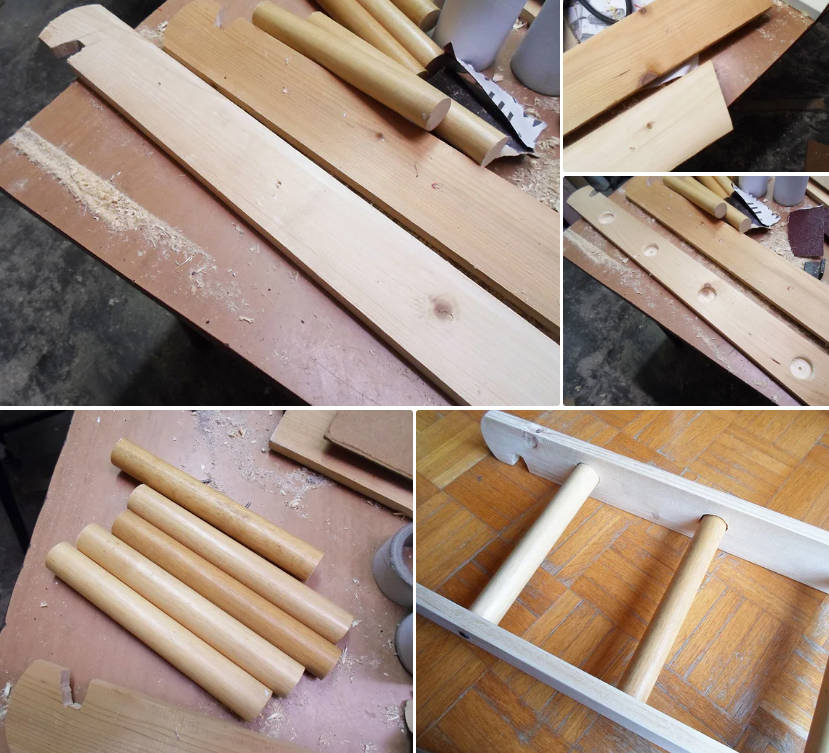
- Cut two strips: 37.4 x 2.75 inches.
- Cut five smaller rods: 8.66 inches each.
- Drill “half holes” into the strips and insert the rods.
- Secure with screws and wrap twine around each step.
- Decorate with paw print stencils.
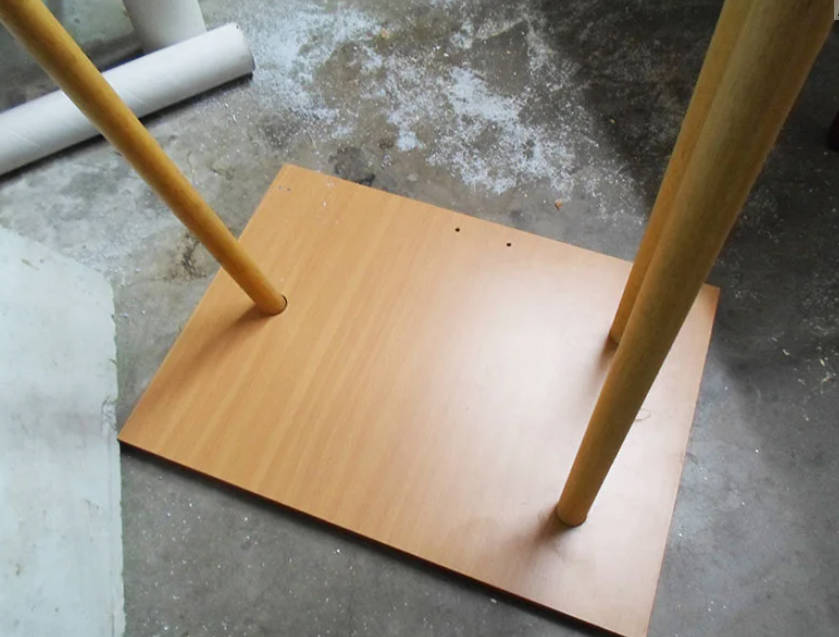
Step 12: Secure the Base

- Attach the rods into the “half holes” of the base.
- Secure from underneath with screws.
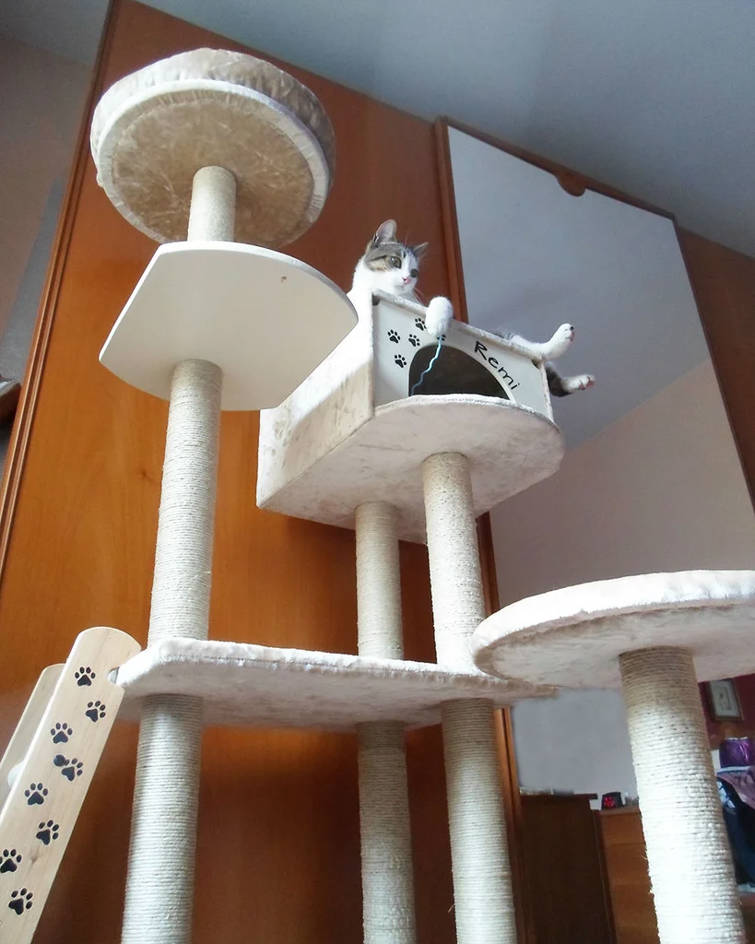
Step 13: Assemble the Cat Tree

Follow this order for assembly:
- Insert the largest tube on one of the middle rods.
- Insert shorter tubes into remaining rods.
- Stack wooden platforms onto appropriate rods.
- Attach the round tops and cat house securely.
Step 14: Sew the Pillow

- Cut a fabric strip matching the round top’s circumference.
- Sew the strip into a ring and stuff it with batting.
- Close the seam with glue or stitching.
Step 15: Attach the Pillow

- Use Velcro strips to secure the pillow to the round top.
- This makes it removable for easy cleaning.
Other Details Display
- Ladder angle: Customizable placement.
- Base movement: The smaller base section can be adjusted to fit different spaces.
- Material alternatives: Wood can be replaced with MDF or plywood.
Summary
This DIY cat tree is an affordable, customizable solution that your feline friend will love. With multiple levels, scratching posts, and a cozy cat house, it provides endless entertainment. Plus, using repurposed materials makes it an eco-friendly and budget-friendly alternative to store-bought cat trees.
This plan is a contribution by [lindarose92]. Project Via Instructables – Get the PDF Instructions here.