If you have a high-energy cat who loves to climb but find most commercial cat trees unappealing, a DIY approach can be the perfect solution.
When my husband and I decided to build a cat tree for our two-year-old feline, Saavik, we wanted something that was both functional and aesthetically pleasing.
Since we are big Star Trek fans, we designed a cat tree inspired by the iconic starships from the franchise. Here’s how we built it step by step.
Why This Cat Tree Works
- Designed for Active Cats: The multiple levels provide ample climbing opportunities, making it a great energy outlet.
- Scratch-Friendly: Sisal-wrapped trunks allow for plenty of scratching space, saving your furniture.
- Custom Aesthetic: Unlike generic cat trees, this design is a statement piece for any sci-fi-loving household.
- Modular and Stable: The structure can be disassembled for transport, and wall braces keep it wobble-free.
What You Will Need
Materials:
- PVC Pipes: 9’ and 5’ lengths (for trunks and ship structures)
- Plywood Boards:
- 2’ x 3’ (for base)
- 15” and 18” pine round panels (for saucer sections)
- 1’ x 3’ (for Romulan Bird of Prey wings)
- Caps & Connectors:
- 8 round caps (for nacelle tips)
- 4 flat caps (for pipe-to-ship and pipe-to-base connections)
- 3 T-connectors
- 1 X-connector
- 2 elbow connectors
- 2 straight connectors
- Hardware & Fasteners:
- 15 bolts (2” length, 5/16” or 1/4” diameter)
- 3 bolts (2 1/2” length for Bird of Prey assembly)
- 18 matching nuts
- Other Materials:
- 250 feet sisal rope (1/4” diameter)
- Carpet remnants (12’ x 4’)
- Pipe adhesive
- L-braces (for wall stabilization)
Tools:
- Utility knife (for cutting carpet)
- Handsaw (for cutting PVC and wood)
- Staple gun (5/16” minimum staple length)
- Drill (for bolt holes and assembly)
- Ratchet wrench (for securing nuts)
- Scissors (for carpet trimming)
How to Make It
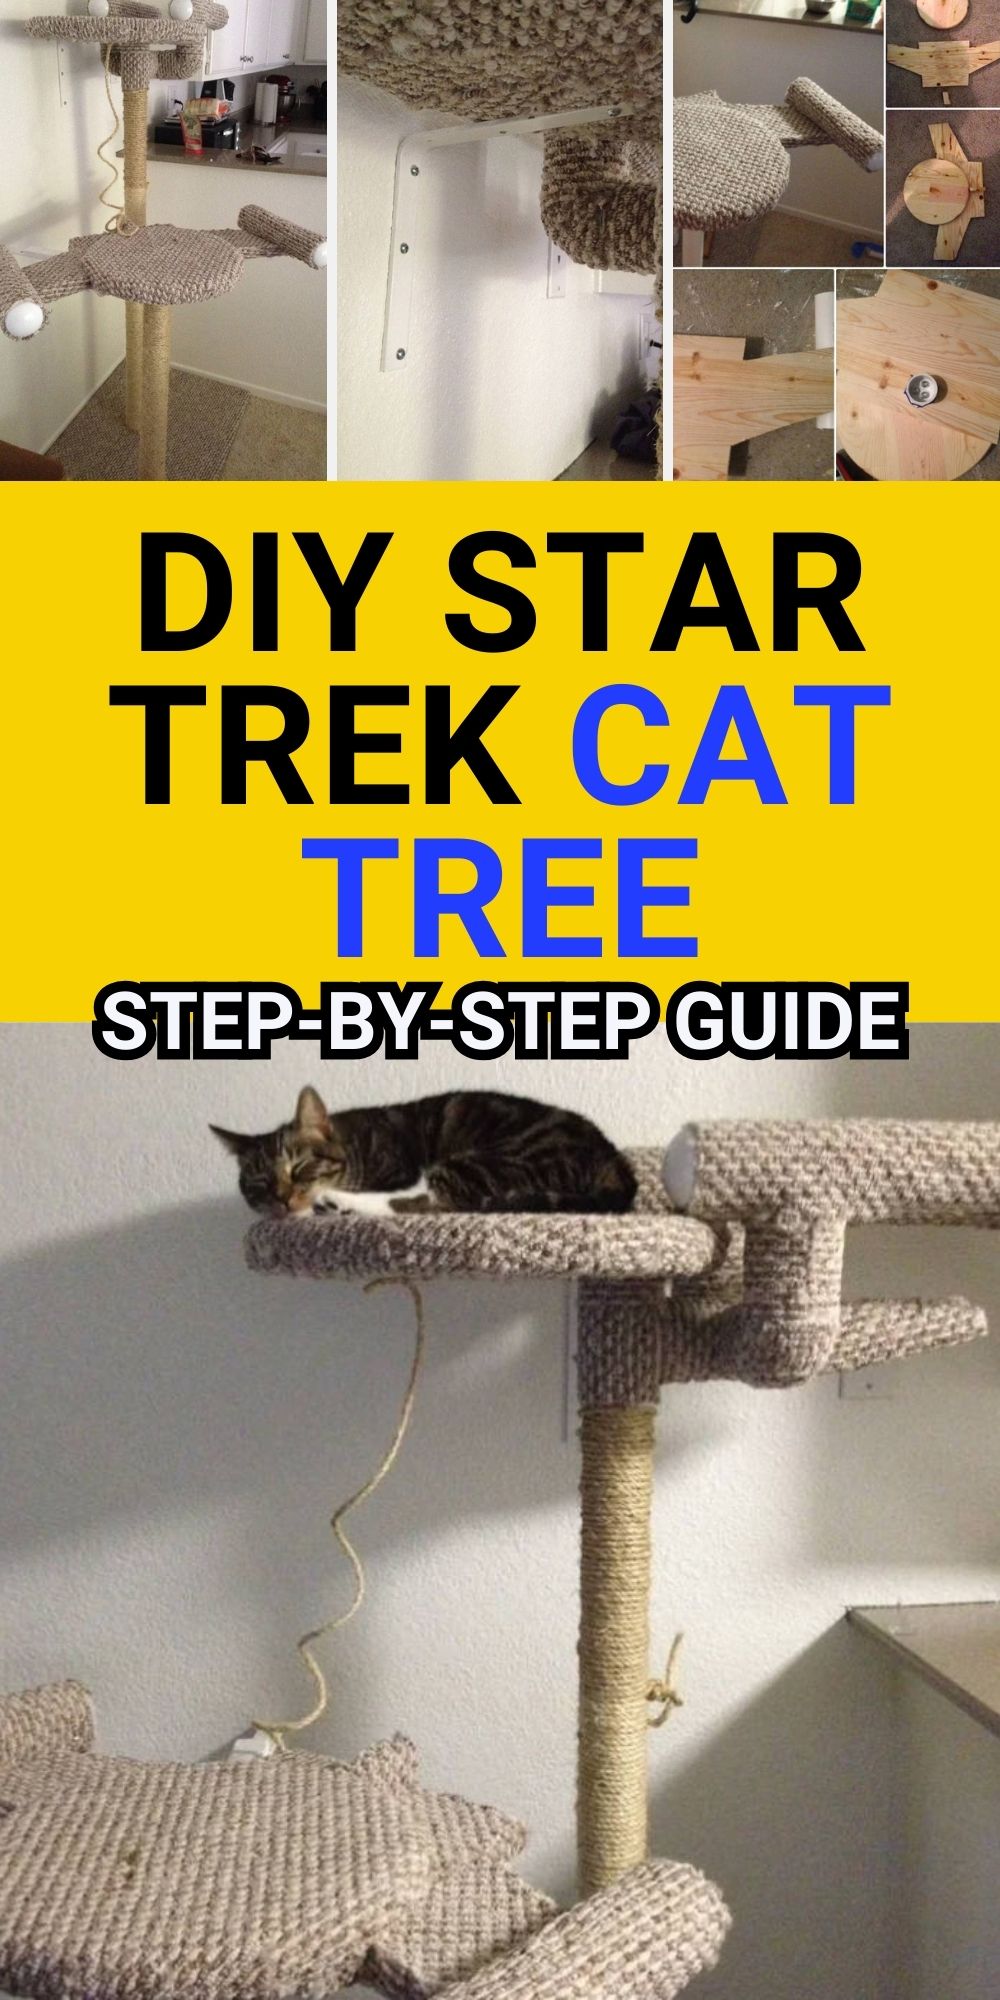
Step 1: Constructing the Enterprise

The Enterprise design consists of a large saucer section with a PVC frame.
- Attach a flat cap to the 18” round plywood saucer section using bolts.
- Assemble the frame using PVC pipes, T-connectors, elbow connectors, and an X-connector. Use pipe adhesive to secure the joints.
- Carpet the saucer section and frame separately, using staples to secure the fabric.
- Glue a small piece of pipe between the cap and T-connector to attach the frame.
- Ensure no staples are exposed by pressing them firmly into the carpet.
Step 2: Building the Romulan Bird of Prey

This section required some custom wood cutting to create the distinctive winged shape.
- Cut the 1’ x 3’ plywood board into two wing-shaped pieces.
- Attach a small leftover wood piece to the center for additional detailing.
- Bolt the nacelle pipes to the wings.
- Attach a flat cap to the bottom center to connect the ship to the PVC trunk.
- Fully carpet the structure after assembly.
Step 3: Creating the Base and Trunks

The base provides stability, while the PVC trunks elevate the ships.
- Cut two PVC pipes to 3’ and 5’ lengths.
- Carpet the 2’ x 3’ plywood base board.
- Bolt two flat caps onto the base, using four bolts per cap for stability.
- Attach straight connectors to the PVC trunks, but do not glue them into the base (to allow future disassembly).
- Secure the ships onto the top of each trunk without gluing, for removability.
- Wrap sisal rope tightly around the PVC trunks to create scratching surfaces.
- Staple a small piece of sisal rope under the Enterprise to serve as a toy.
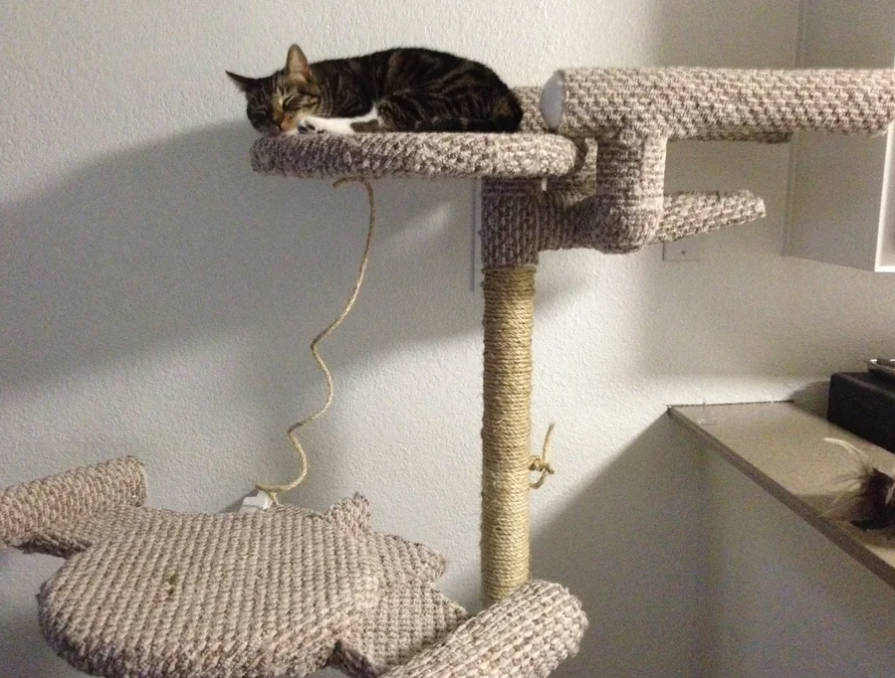
Step 4: Stabilizing the Structure

Given the weight of the starships, the tree initially wobbled. To prevent this:
- Install L-braces to secure the ships to the wall.
- Use 10” and 8” L-braces, attached with 2”–2.5” long screws.
- Position the braces discreetly to maintain aesthetics while ensuring stability.
Other Details for Display
- Saucer sections are carpeted for comfort and better traction.
- The scratching posts are wrapped in natural sisal rope for durability.
- Wall-mounted braces ensure stability, making it safe for energetic cats.
- The modular build allows for easy transport and adjustments.
Summary
This Star Trek cat tree combines functionality with fandom, giving your feline a fun, high-energy climbing space while adding a unique sci-fi touch to your home.
With durable materials and a sturdy build, it’s an excellent DIY project for cat lovers who want a custom-built, aesthetic alternative to traditional cat trees.
This plan is a contribution by [hatstand4510]. Project Via Instructables – Get the PDF Instructions here.