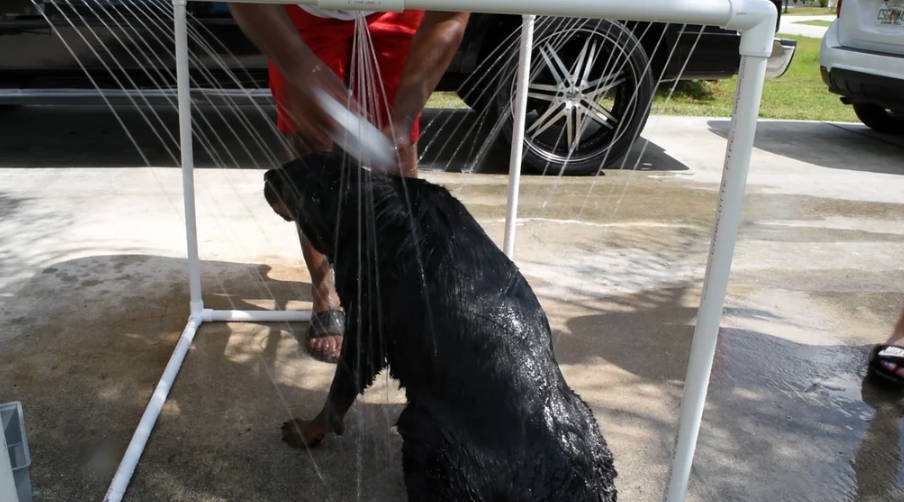
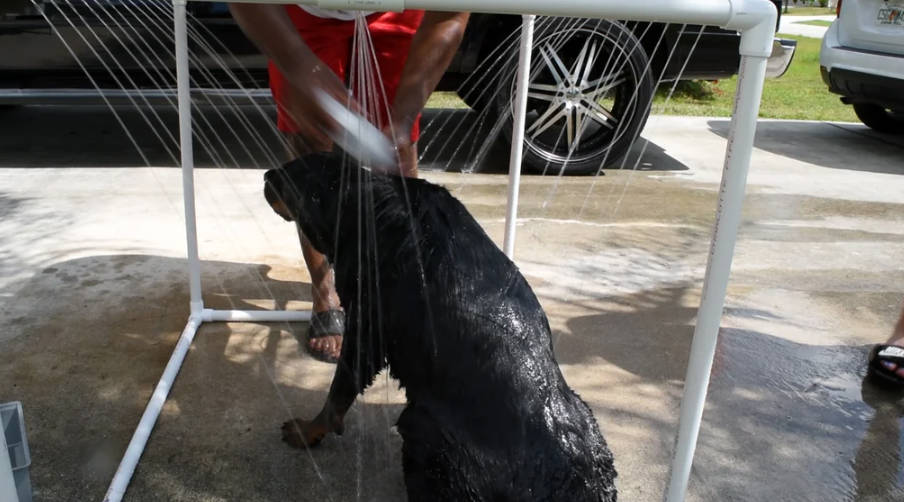
Bathing a dog can sometimes be a struggle, especially when they are eager to escape the moment the water stops. To make this process more efficient and stress-free, we built a simple yet effective outdoor dog shower.

This setup allows for hands-free washing, covering more of your dog’s body at once, and can be easily disassembled for storage. If you’re looking for a better way to bathe your furry friend, follow along as we walk you through building your own outdoor dog shower!
Why This Plan Works
- Hands-Free Washing: Keeps both hands available for scrubbing instead of managing the hose.
- Full-Body Coverage: Water flows from multiple angles, ensuring even wetting and rinsing.
- No Permanent Installation: Built without glue for easy breakdown and storage.
- Customizable: Adjust the height and width to fit different dog sizes.
- Cost-Effective: Made using readily available PVC pipes and connectors.
What You Will Need

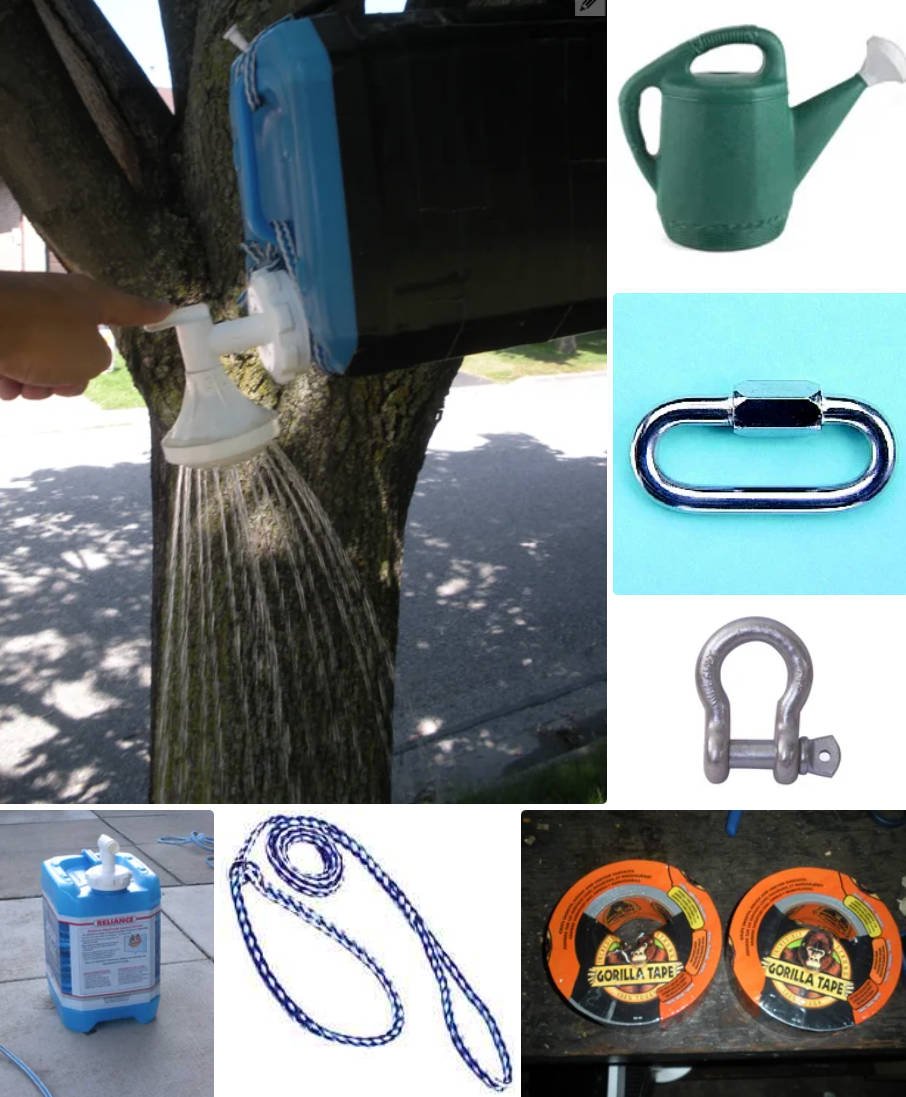
To build this outdoor dog shower, you’ll need the following parts:
- (8) Three-way elbows
- (1) 3/4″ hose swivel adapter
- (1) 3/4″ 45-degree elbow
- (1) Hose cut-off valve
- (3) 3/4″ tees
- (5) 10-foot PVC pipes, cut as follows:
- 8 pieces of 31 inches
- 3 pieces of 40 inches
- 1 piece of 39.5 inches
- 1 piece of 36.5 inches
- 1 piece of 2.25 inches
- 1 piece of 1.75 inches
- PVC pipe cutter
How to Make
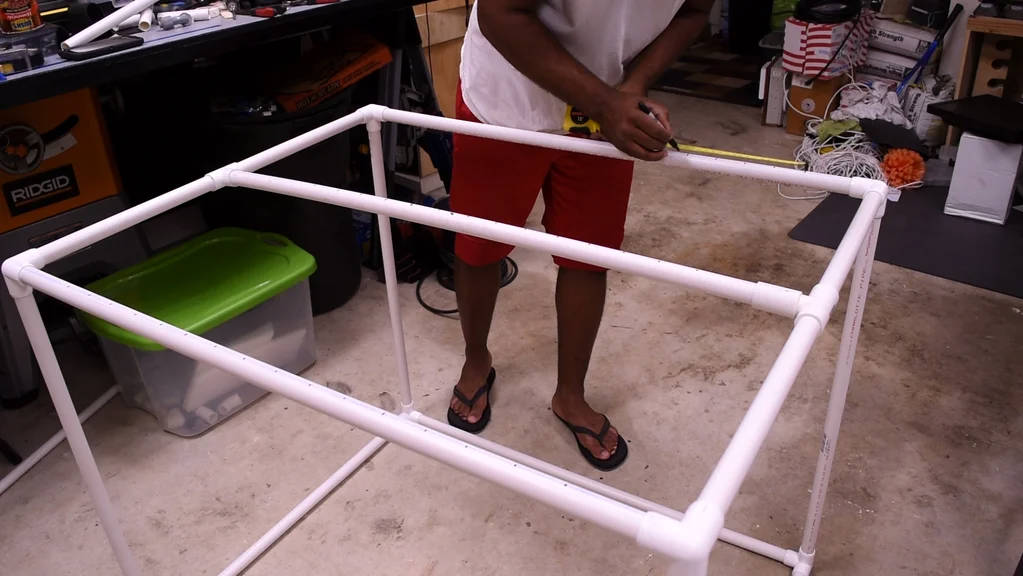
Step 1: Assembling the Frame

- Connect the eight three-way elbows to create the rectangular base and top frame.
- Use the 31-inch PVC pipes to form the vertical supports.
- Attach a 36.5-inch PVC pipe where the hose adapter will be installed.
- Complete the frame by adding two 40-inch pipes for the top structure.
Step 2: Attaching the Water Inlet

- Insert the 2.25-inch PVC pipe into one of the three-way elbows.
- Connect a 3/4-inch tee to this piece.
- Attach the 1.75-inch PVC pipe, ensuring it points upward.
- Install the 45-degree elbow onto this pipe.
- Secure the swivel hose adapter to the elbow.
- Finally, attach the hose cut-off valve to control water flow.
Step 3: Adding the Middle Water Dispenser

- Take the remaining 40-inch PVC pipe and mark its center.
- Attach two 3/4-inch tees at equal distances along the pipe.
- Secure this pipe horizontally at the top of the frame.
Step 4: Making the Water Dispenser Holes
- Use a chalk line to mark a straight line along each pipe.
- Start by marking a hole 3 inches from each end.
- Continue marking every 2 inches along the length of the pipes for even water distribution.
Step 5: Drilling the Holes

- Use a small drill bit to carefully drill through the marked points.
- If available, use a drill press with a jig for straighter holes.
- If using a hand drill, take your time to ensure accuracy, though slight deviations won’t affect performance.
Step 6: Testing the Setup

- Connect the hose to the adapter.
- Turn on the water and check for even distribution.
- Adjust any loose joints or realign pipes as needed.
- Since the pipes aren’t glued, rotate them to fine-tune the direction of water flow.
Step 7: Using the Outdoor Dog Shower

- Turn on the water to wet your dog thoroughly.
- Shut off the water to lather your dog with shampoo.
- Turn the water back on for a quick and even rinse.
- Dry your dog and disassemble the shower for easy storage.
Note: If there are any leaks, ensure the PVC connections are tightly fitted. Adjusting the positioning of holes can help optimize water flow.
Other Details to Keep in Mind
- Size Adjustments: Modify the PVC lengths if you need a larger or smaller shower frame.
- Water Pressure Consideration: Ensure adequate pressure for even water distribution; larger holes may reduce pressure.
- Portability: Easily disassembled for compact storage when not in use.
- Durability: Use high-quality PVC to extend the lifespan of your setup.
Summary
Building an outdoor dog shower is an excellent way to make bath time more efficient and enjoyable. With a simple PVC pipe structure and a strategically placed water dispenser, you can ensure a thorough and hassle-free wash for your furry friend. Try this DIY project and make dog bathing easier than ever!
This plan is a contribution by [diycreators]. Project Via Instructables – Get the PDF Instructions here.