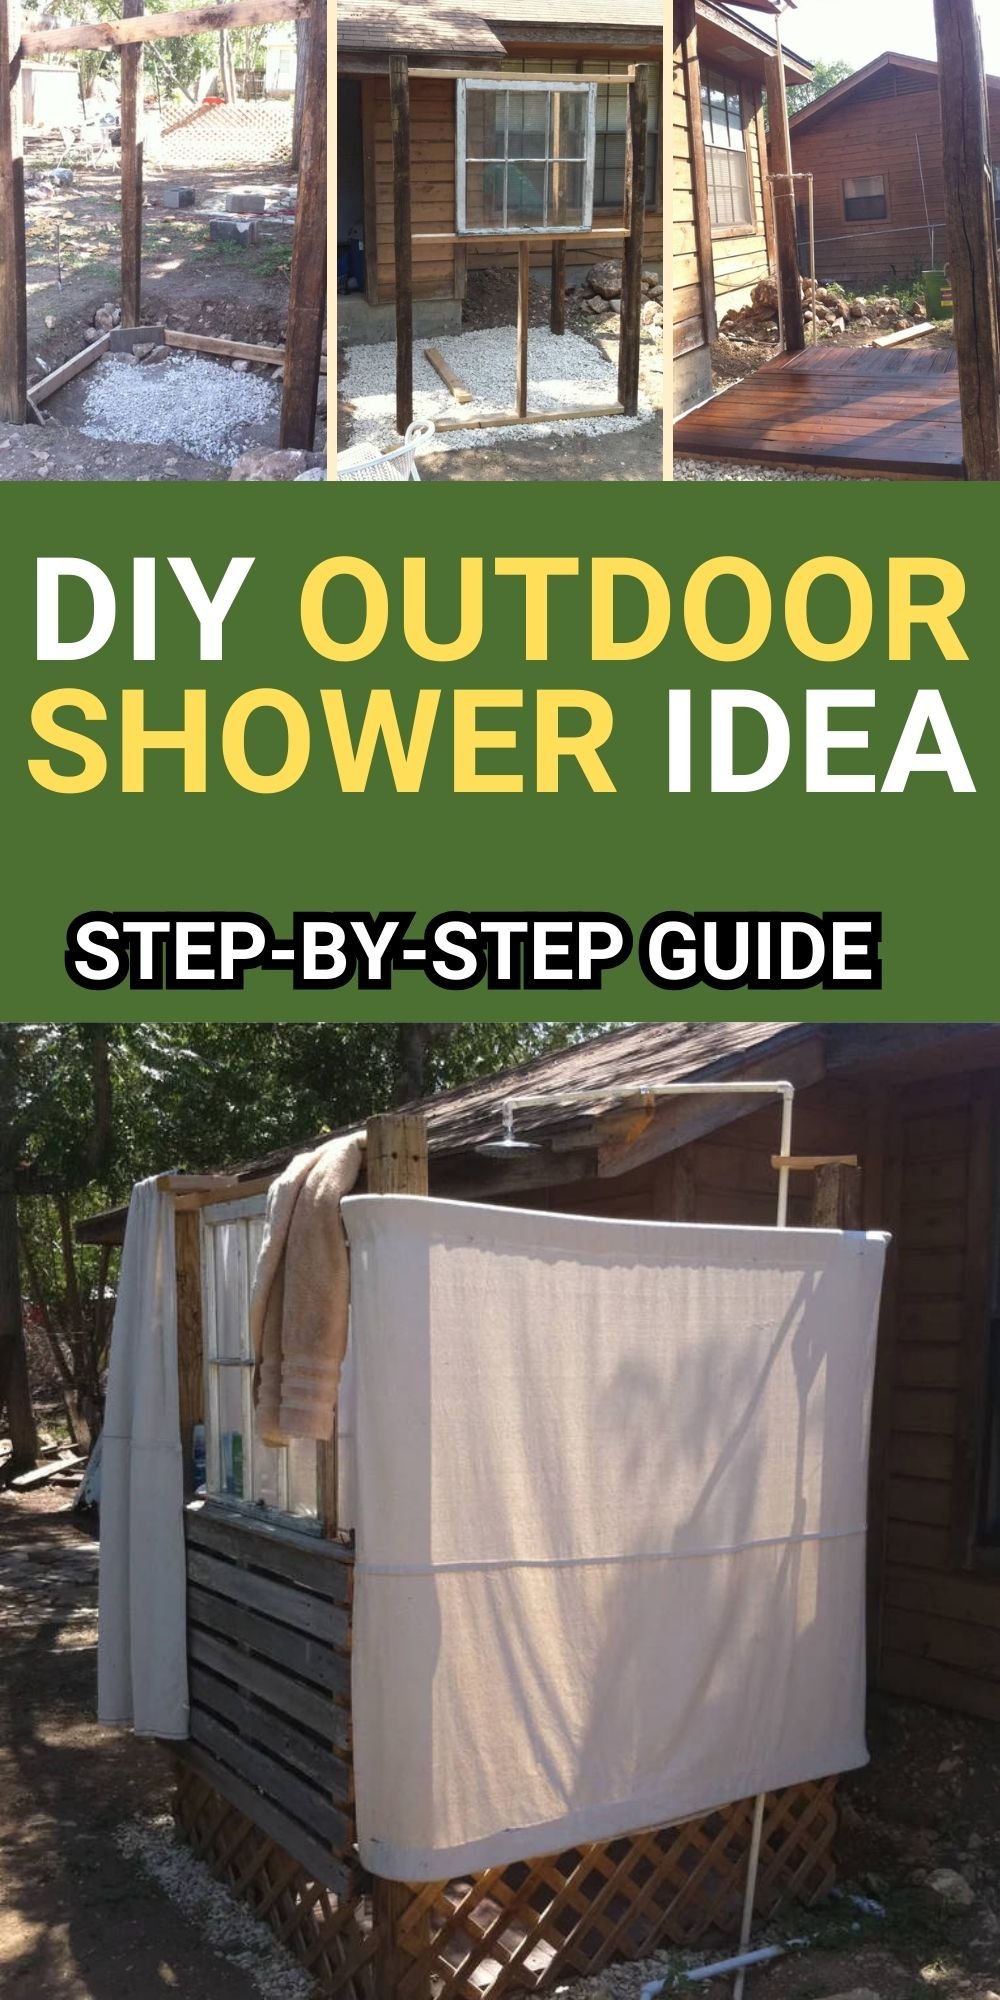

Outdoor showers are an excellent addition to any home, providing a refreshing way to cool down in the summer while being a great off-grid bathing solution. This guide will walk you through constructing an outdoor shower with a batch solar water heater, ensuring you have access to warm water even in an outdoor setting.
Why This Plan Works
- Cost-effective – Uses affordable and repurposed materials.
- Eco-friendly – Solar water heating reduces energy consumption.
- Functional and durable – Designed to withstand the elements.
- Customizable – Adaptable to different spaces and structures.
What You Will Need
- 2×4 wooden beams
- 3/4″ PVC pipes and fittings
- Quick-set concrete (Quikrete)
- Gravel (1.5 cubic yards)
- Canvas or painter’s throw for curtains
- Conduit pipes for curtain rods
- Old water heater tank (30-50 gallons)
- Heat-resistant black paint
- Insulation materials (fiberglass or water heater blankets)
- Reflective insulation material (Reflectix)
- Tempered glass (low iron, high transmittance preferred)
- Sealant (Great Stuff or equivalent)
- Basic plumbing materials (valves, T-joints, primer, and glue)
How to Build the Outdoor Shower
Step 1: Preparing the Site

Selecting a location near your house can be practical, utilizing existing walls for support. This project was built in a 5.5’ x 5.5’ area, with the shower deck being 4.5’ x 4.5’.
- Dig a drainage pit: A 2-foot deep hole within the designated area helps drain water efficiently. Filling it with large gravel prevents water buildup and wood rot.
- Prepare the chassis: Construct a square chassis from 2x4s to sit at the base of the pit. This will support the shower poles and foundation.
Step 2: Setting the Shower Poles
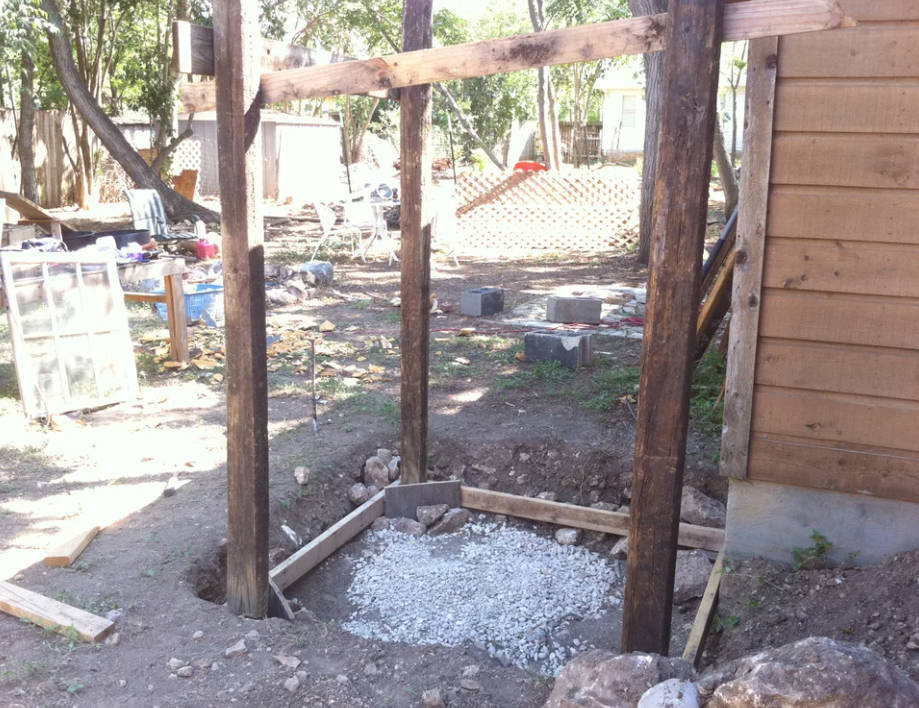
- Build a wooden chassis as a form for concrete to secure the posts.
- Position three posts, using the house wall as the fourth support.
- Ensure level alignment and fasten posts using large screws.
- Pour quick-set concrete into the forms to solidify the structure.
- Brace the posts with temporary boards to maintain stability while the concrete sets.
Step 3: Filling the Shower Pit

- Once the posts are set, fill the drainage pit with large gravel.
- This improves water drainage and prevents standing water issues.
Step 4: Building the Deck Base and Frame
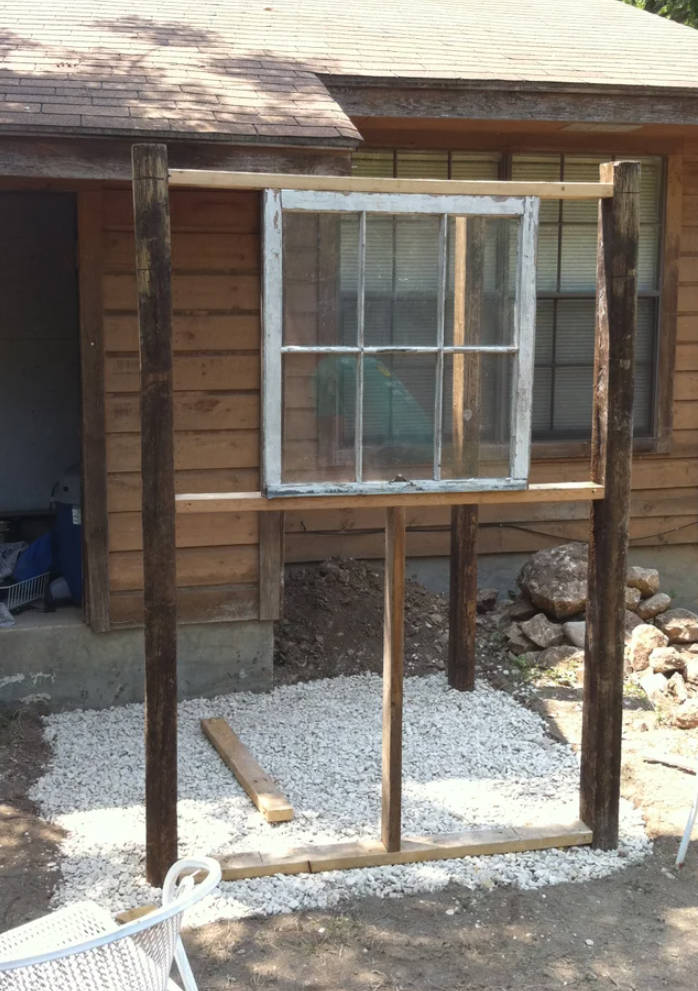
- Attach a deck frame to the shower poles and house wall.
- Use 2x4s to construct the walls, ensuring they are properly aligned and level.
- Waterproof all wooden surfaces using a weatherproofing stain.
- Consider adding a decorative window or upcycled materials for character.
Step 5: Installing the Deck
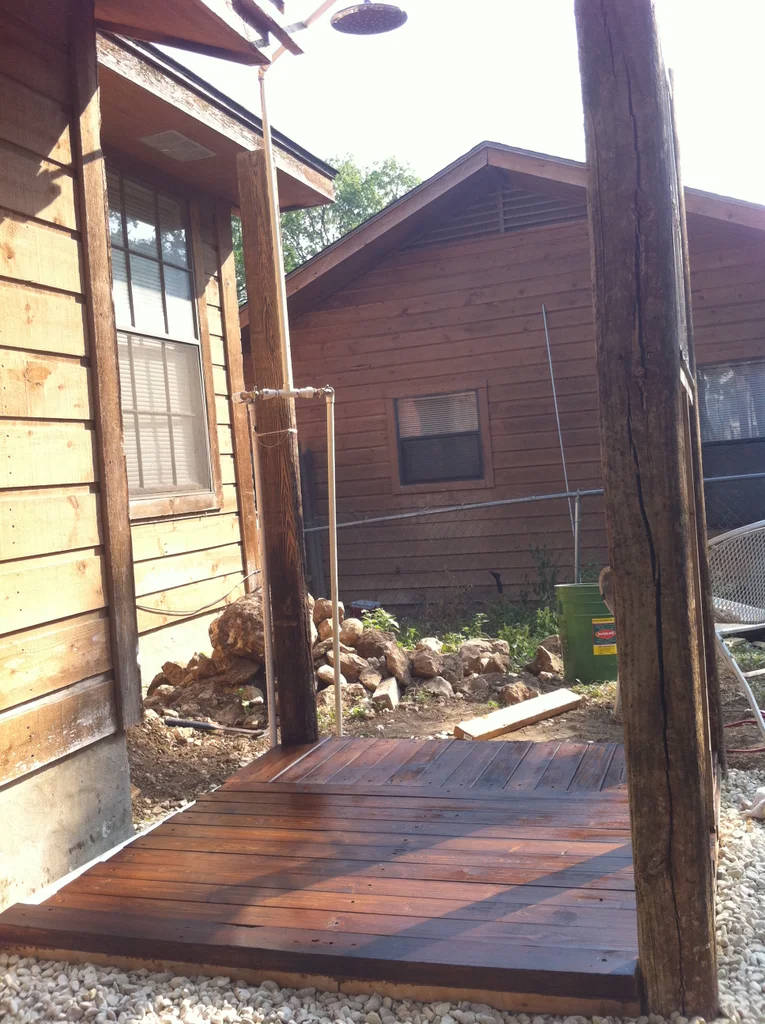
- Use smooth-sanded 2x4s as decking planks.
- Pre-stain the planks before installation for added protection.
- Arrange the planks for tight-fitting alignment to allow for drainage while keeping a smooth, barefoot-friendly surface.
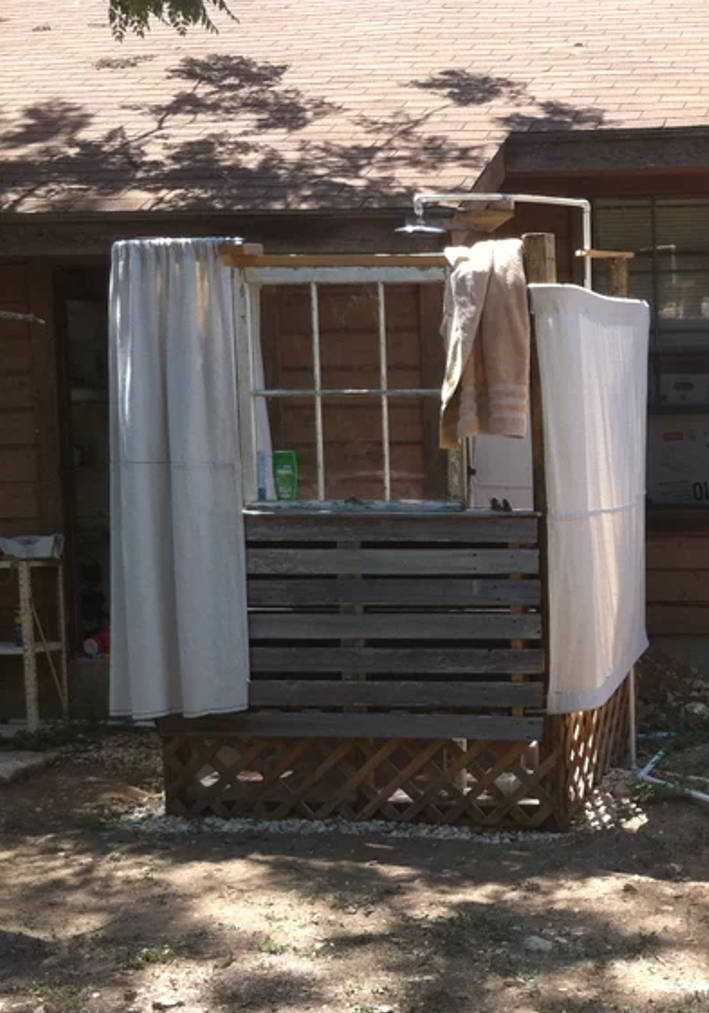
Step 6: Adding Walls, Curtains, and Rods

- The rear wall is fixed using a canvas sheet looped at the top and bottom.
- The front curtain is sliding, hung on a bent conduit rod.
- Secure the curtain edges with clips to prevent wind displacement.
- Attach lattice panels at the bottom for ventilation and additional water drainage.
- Use repurposed wood for a rustic look, ensuring gaps allow airflow.
Building the Batch Solar Water Heater
Step 7: Preparing the Water Heater Tank

- Find an old water heater (30-gallon recommended).
- Remove outer insulation and clean the tank.
- Apply heat-resistant black paint for maximum solar absorption.
- Ensure the hot water outlet is elevated to optimize heat retention.
Step 8: Constructing the Hot Box
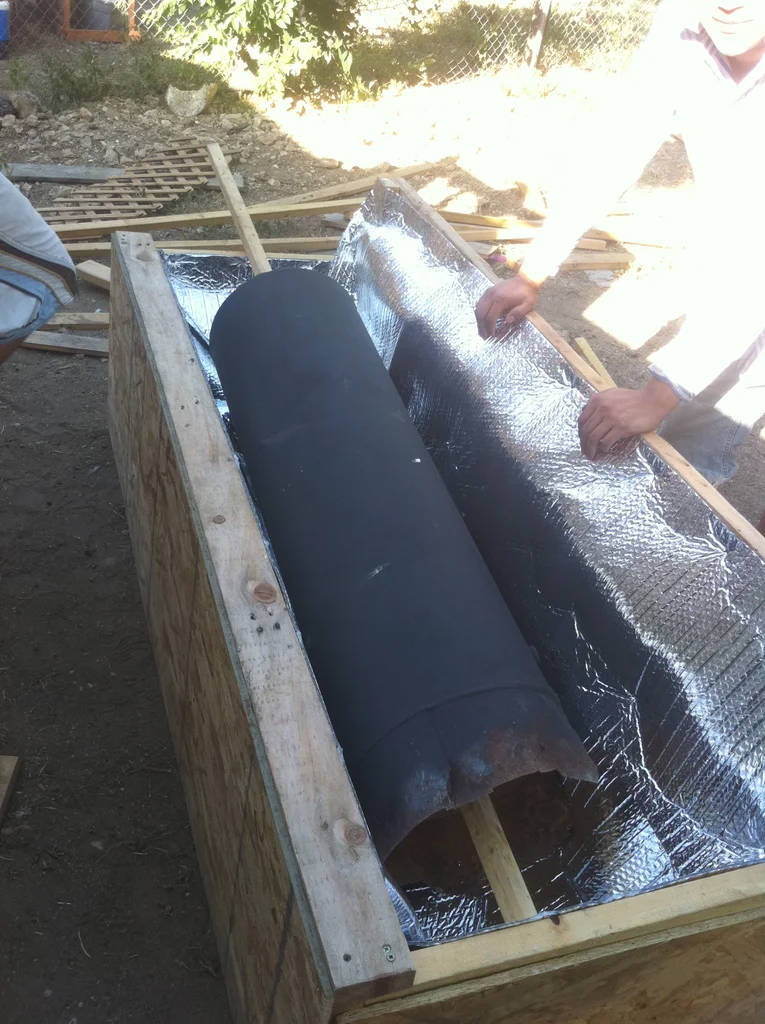
- Build a wooden box with a slanted top to maximize solar exposure.
- The size should be slightly larger than the tank, allowing room for insulation and plumbing.
- Line the interior with fiberglass insulation and Reflectix for heat retention.
- Use high-transmittance tempered glass for the top cover.
- Seal all joints with Great Stuff insulation foam.
Step 9: Plumbing the System

- Run a PVC pipe from the water spigot to a T-joint.
- One branch leads to the solar water heater, and the other to a mixing valve.
- Attach the hot water output from the tank to the mixing valve, allowing temperature control.
- Use flexible PVC to account for thermal expansion and seasonal adjustments.
Other Important Details

- Structural Stability: Use concrete footings for durability.
- Drainage Considerations: Ensure gravel fill is deep enough for water absorption.
- Water Temperature Management: Adjust the mixing valve as needed for comfort.
- Seasonal Adjustments: The solar heater box can be repositioned for maximum efficiency.
Summary
This outdoor shower with a batch solar water heater is a fantastic addition to any home, offering a sustainable, energy-efficient solution for outdoor bathing. By using reclaimed materials, solar power, and thoughtful design, you can create a functional and stylish shower that blends seamlessly into your outdoor space. Whether for post-swim rinses or off-grid living, this DIY project is both practical and rewarding!
This plan is a contribution by [samstav]. Project Via Instructables – Get the PDF Instructions here.