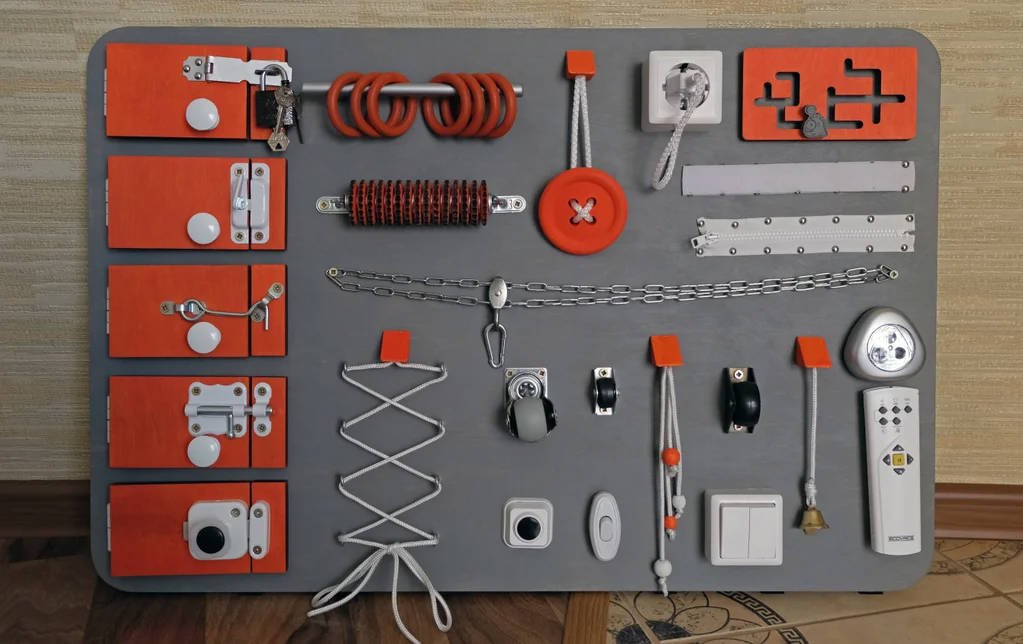

A busy board is a fantastic way to engage a child’s curiosity while developing fine motor skills, hand-eye coordination, and problem-solving abilities. In this guide, we’ll walk you through the process of building a customized busy board using plywood, simple tools, and various interactive elements. Let’s get started!
Why This Plan Works

- Encourages sensory and motor development
- Customizable to your child’s interests
- Uses simple materials that are easy to source
- Provides a fun DIY project for parents and caregivers
What You Will Need
- 3mm and 6mm plywood (for cutting)
- Wood glue and cementing materials
- Sandpaper or polishing tool
- Paint or wood dye
- Assorted elements like cogwheels, Velcro, zippers, doors, sockets, and plugs
- Screws, nails, and fasteners
- Drill and appropriate drill bits
- Hot glue gun and adhesive
How to Make
Step 1: Prepare the Base for the Busy Board
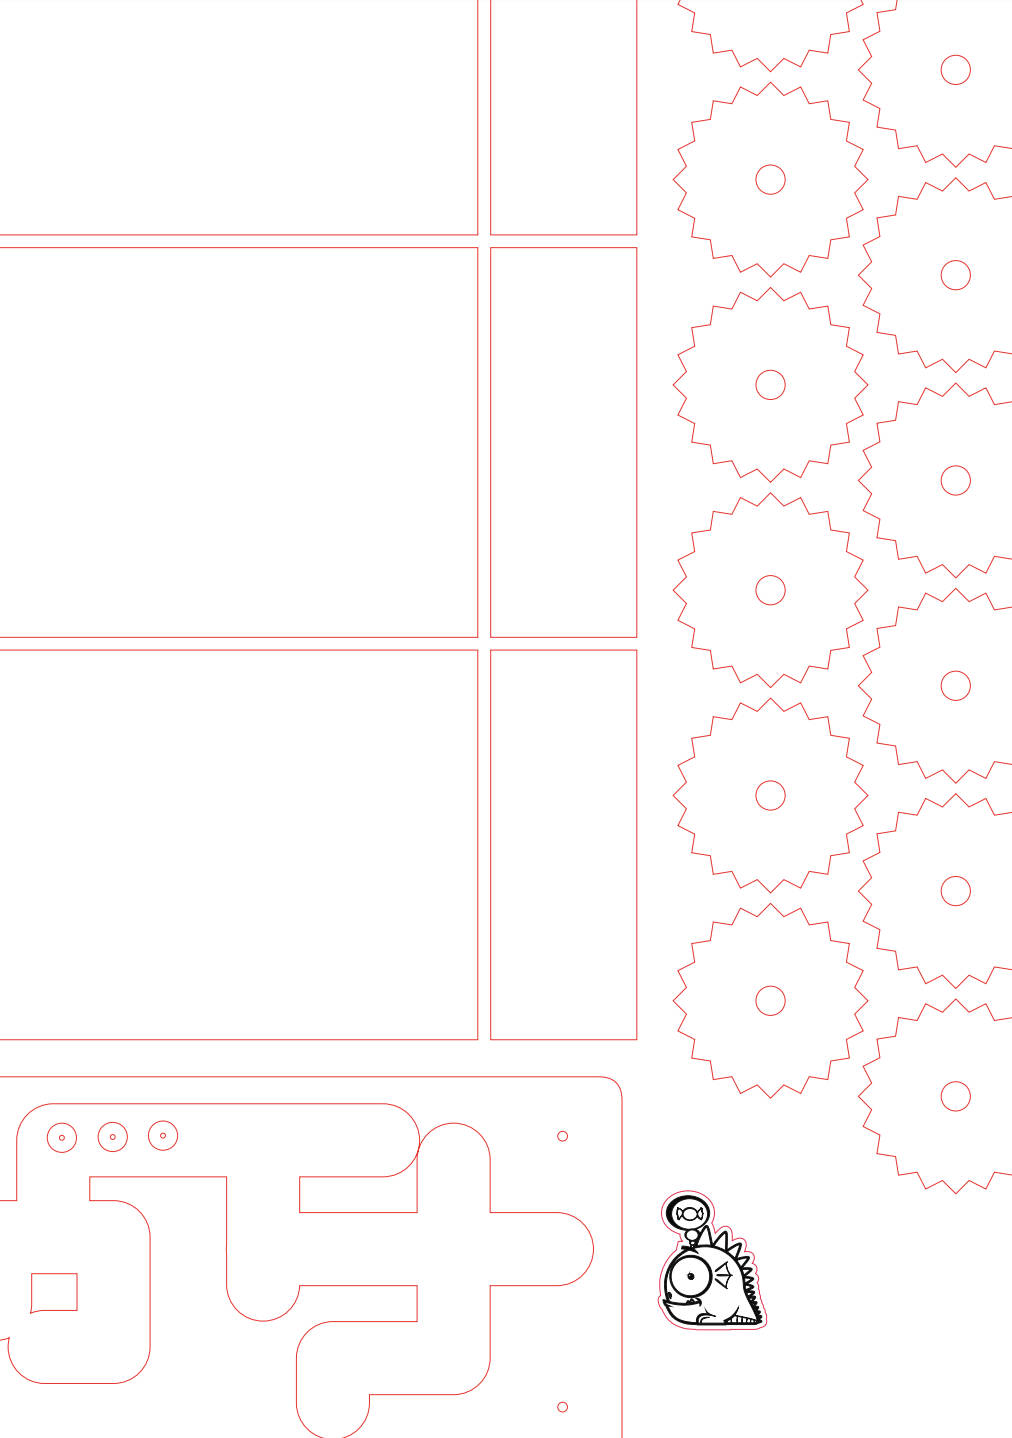
Use the provided laser-cutting scheme to cut the plywood into the required shapes. If you need a thicker base, combine multiple layers of plywood and cement them together to create a sturdy 12mm board.
Step 2: Cement the Plywood

To strengthen the board, cement the following pieces together:
- Main base
- 5 doors
- 5 smaller door panels
- Labyrinth structure
- Clamping for the dragon figure
Step 3: Choose the Palette

Select a base color for your busy board and one or two complementary colors for the interactive elements. Bright, contrasting colors can help stimulate a child’s visual perception.
Step 4: Polishing

Before dyeing or assembling, polish all wooden parts to remove rough edges. Smooth surfaces ensure a safe and aesthetically pleasing result.
Step 5: Polish the Cogwheels

Use sandpaper to smooth the edges of the cogwheels. A well-polished cogwheel will rotate effortlessly, making it more engaging for a child.
Step 6: Dyeing

Paint or stain all wooden elements according to your chosen color scheme. Allow them to dry completely before assembling.
Step 7: Create the Labyrinth Keeper

Construct a small dragon figure for the labyrinth, ensuring it fits snugly onto the base. It must be assembled on the labyrinth board before securing it to prevent difficulty in movement later.
Step 8: Combine Cogwheels

Attach the cogwheels onto the board using pins and spacers. Secure them at the edges with fixtures to allow for smooth rotation.
Step 9: Analyze Placement

Temporarily position all elements on the board to assess the final layout. This step helps prevent errors before drilling and fastening.
Step 10: Complete the Doors

Attach all five doors with hinges and secure them in place. The second, smaller door panels should be glued in position, but prepare holes in the base for additional fastening from the backside.
Step 11: Add Socket and Plug

For safety and ease of use, replace any wires with cords. Fix the cord inside the plug using hot glue.
Step 12: Mark and Drill

Drill holes for all remaining elements based on your layout from Step 9. Double-check the placements before drilling.
Step 13: Assemble the Elements

Some buttons and interactive features may not have pre-drilled holes. Drill them where needed and secure them onto the board using either screws or hot glue.
Step 14: Additional Assembly

For any cords, use knots and hot glue to secure them firmly in place.
Step 15: Secure the Labyrinth

The labyrinth should be cemented onto the board and fastened from the backside. Pre-drill holes in the base before final assembly.
Step 16: Final Assembly

Ensure all elements are properly fastened to avoid hazards. Tighten any loose fixtures that may pose a risk to the child.
Step 17: Attach Velcro and Zipper

Secure Velcro strips and zippers using nails in pre-drilled holes. Ensure nails are smooth and child-safe.
Step 18: Fasten the Backside

For extra durability, reinforce any glued elements by securing them with nails or screws from the backside of the board.
Step 19: Finishing Touches
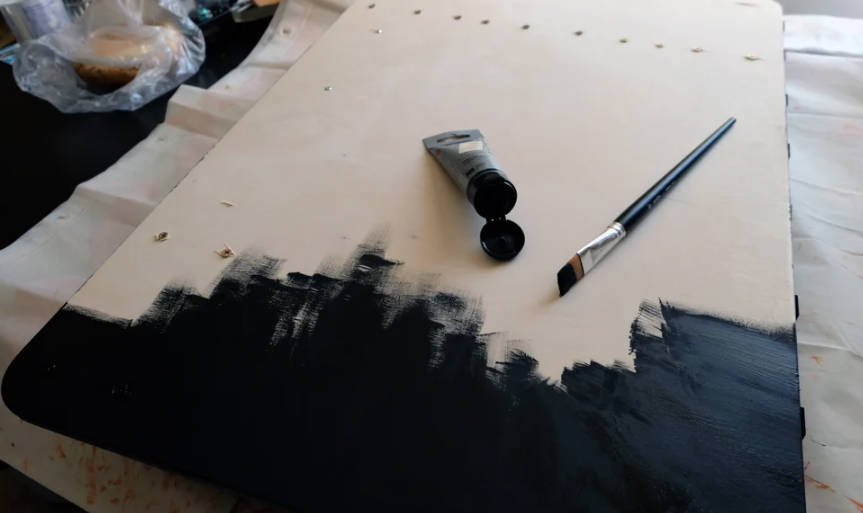
Paint or dye the back of the board to complete the look.
Other Details Display
- Labyrinth figure: Secure before final assembly
- Cogwheels: Must spin freely after installation
- Doors: Ensure they open and close smoothly
- Sockets and plugs: Use safe materials suitable for children
- Zippers and Velcro: Secure well to prevent detachment
Summary
Building a busy board is an exciting DIY project that results in a fun and educational toy for children. By carefully following these steps and using safe materials, you can create a sturdy and engaging board that will provide hours of interactive play.
This plan is a contribution by [xxxx]. Project Via Instructables – Get the PDF Instructions here.


