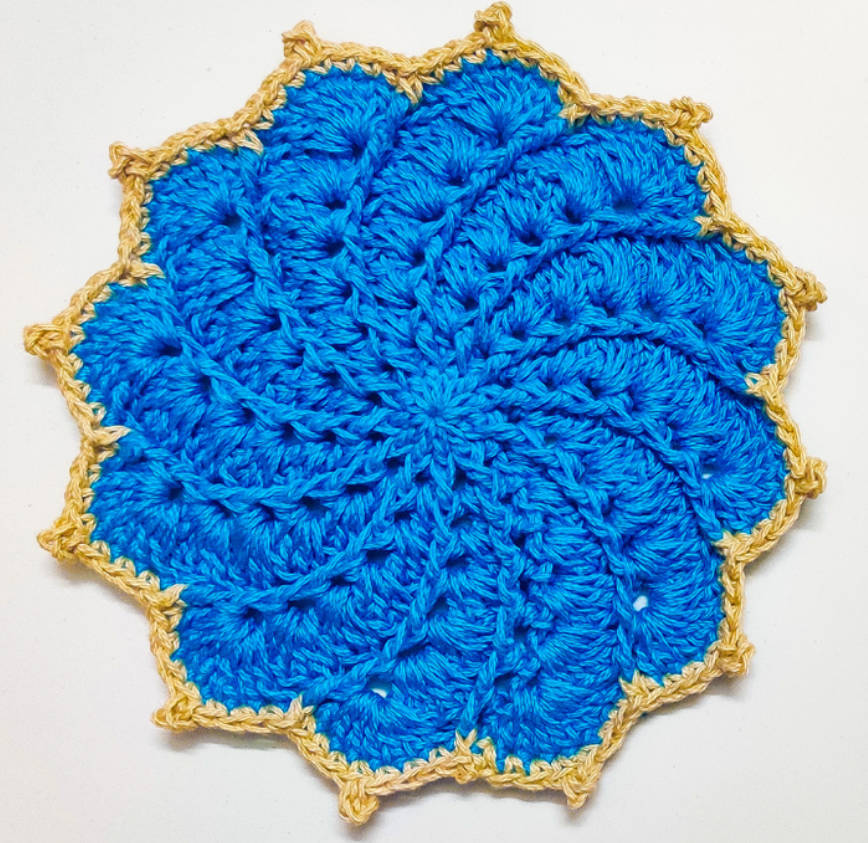
Crochet doilies are a charming and timeless addition to any home decor. These delicate, lacy designs bring warmth and elegance to shelves, tables, and small spaces. Not only are crochet doilies versatile, but they are also a fantastic project for both beginners and experienced crocheters. With their intricate patterns and quick work-up time, they make excellent handmade gifts and decoration pieces.

In this post, we will guide you through the Whirlpool Crochet Flower Doily pattern. This simple yet stunning design can be customized in size and color to fit your style. Plus, it’s a great way to use up scrap yarn while creating something beautiful.
Why This Pattern Works
- Beginner-Friendly – Simple stitches and easy-to-follow instructions make this pattern ideal for those new to crochet.
- Quick to Make – The pattern works up quickly, making it a great weekend project.
- Customizable – Choose any yarn color combination to match your home decor.
- Great for Small Spaces – Perfect for dressing up shelves, tables, and other small areas.
- Uses Scrap Yarn – A fantastic way to use leftover yarn from other projects.
What You Will Need
- Yarn: 4 Ply Cotton Knitting Yarn
- Hook: 4 mm Crochet Hook
How to Make
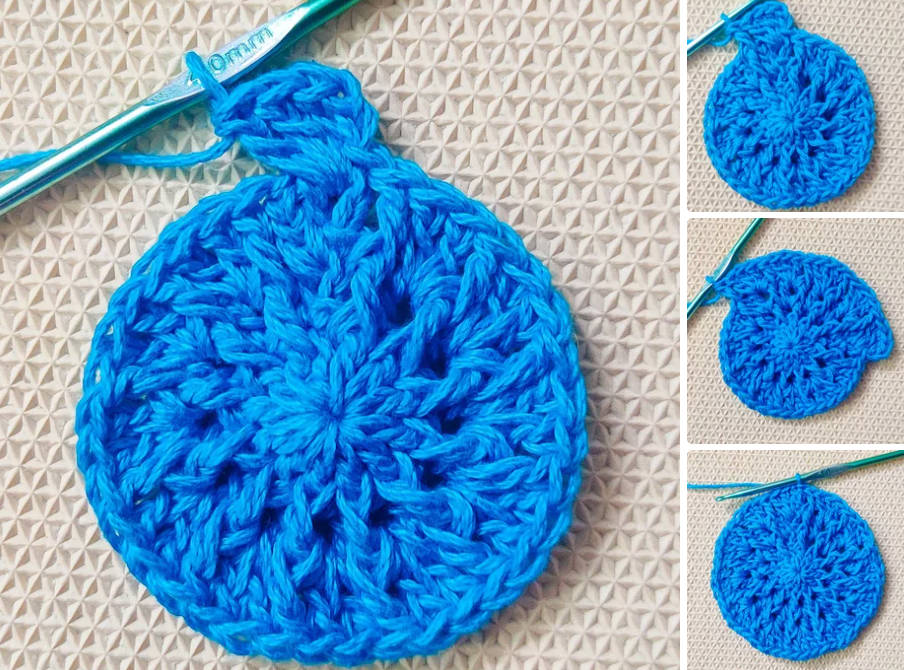
Step 1: Start with a Magic Circle
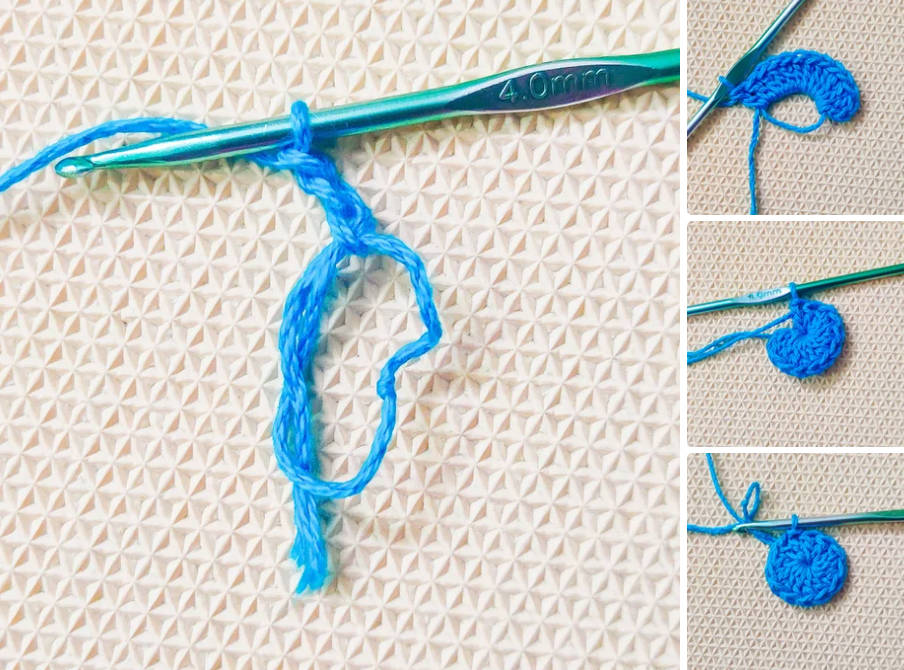
- Make a Magic Circle.
- Crochet 12 Double Crochets (DC) into the circle.
- Pull the yarn end to close the gap.
- Slip Stitch (Sl St) on top of the first Double Crochet to join.
Step 2: Round 2

- Chain 2 (not counted as a stitch).
- 1 DC in the same stitch.
- 1 Front Post Double Crochet (FPDC) in the same stitch.
- Repeat (1 DC, 1 FPDC in the same stitch) around.
- Sl St on top of the first DC to join.
Step 3: Round 3

- Chain 2.
- 2 DC between the Chain 2 and the first DC.
- 1 FPDC on the FPDC from the previous round.
- 2 DC between the FPDC and the next DC.
- 1 FPDC on the FPDC from the previous round.
- Repeat (2 DC, 1 FPDC) around.
- Sl St on top of the first DC to join.
Step 4: Round 4
- Chain 2.
- 3 DC between the Chain 2 and the first DC.
- 1 FPDC on the FPDC from the previous round.
- 3 DC between the FPDC and the next DC.
- 1 FPDC on the FPDC from the previous round.
- Repeat (3 DC, 1 FPDC) around.
- Sl St on top of the first DC to join.
Step 5: Round 5
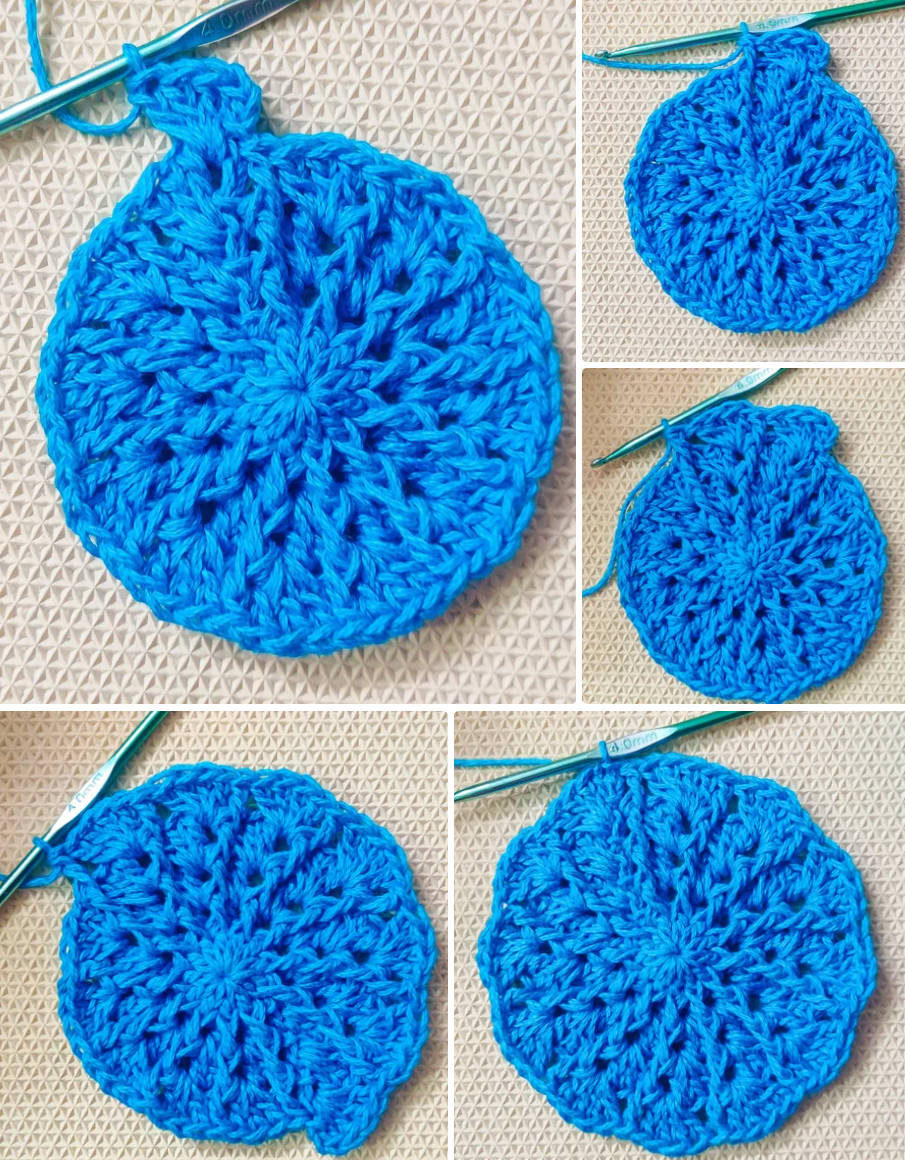
- Chain 2.
- 4 DC between the Chain 2 and the first DC.
- 1 FPDC on the FPDC from the previous round.
- 4 DC between the FPDC and the next DC.
- 1 FPDC on the FPDC from the previous round.
- Repeat (4 DC, 1 FPDC) around.
- Sl St on top of the first DC to join.
Step 6: Round 6 to Round 8 (Increasing Pattern)

- Continue increasing the pattern for 3 more rounds.
- Change yarn color at the end of Round 8.
- Maintain the following increase pattern:
- Round 6 – (5 DC, 1 FPDC)
- Round 7 – (6 DC, 1 FPDC)
- Round 8 – (7 DC, 1 FPDC)
- Always start each round with a Chain 2.
- Keep increasing the starting stitch by 1 with each round.
- Maintain FPDC on the previous round’s FPDC.
Step 7: Border

- Chain 1.
- 1 Single Crochet (SC) in each of the next 4 stitches.
- Picot Stitch (Chain 3, Sl St into the bottom stitch).
- 1 SC in the next 3 stitches.
- 1 Front Post Single Crochet (FPSC) on the FPDC.
- Repeat (1 SC x 4, 1 Picot, 1 SC x 3) around.
- Sl St on top of the first SC and weave off.
Note: Make sure to keep the stitches even to maintain the doily’s symmetry.
Other Details Display
- Skill Level: Beginner to Intermediate
- Time Required: Approximately 2-3 hours
- Best Yarn Choice: Cotton yarn for sturdiness and durability
- Customization Tips: Experiment with different colors or use variegated yarn for a unique effect
- Blocking: Lightly block your doily after finishing to enhance its shape and appearance
Summary
The Whirlpool Crochet Flower Doily is an elegant and quick project perfect for adding a touch of handmade charm to any space. Whether you’re making it for yourself or as a gift, this pattern is sure to impress. Grab your yarn and hook, and let’s start crocheting!
This plan is a contribution by [rajiscrafthobby]. Project Via Instructables – Get the PDF Instructions here.